 will stedden
Parallel IPython with Jupyter Notebooks on a SLURM cluster
I figured it would be such a piece of cake to get my Jupyter IPython notebooks to run parallel on my work cluster, but in the end, I had so much trouble trying to find the simple steps for setting it up. After much fiddling, I offer you an explanation of what is sort of working.
Running a remote ipython notebook server
The first part of this is actually incredibly simple: you need to connect your local browser to a remote Jupyter notebook server. Essentially, all you need is some port forwarding or ssh "tunnelling" to connect your local web browser to an ipython notebook server that is being run through a batch system on the cluster. Sound simple enough? Well unfortunately, I couldn't find any single tutorial that clearly stated the necessary steps outright. I did manage to find two similar examples where the first works correctly but looks overly complicated while the second looks like it should work, but for some reason doesn't.
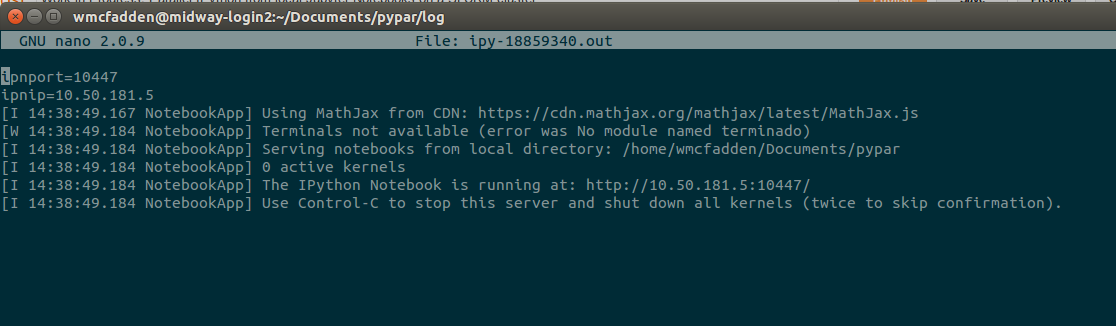
To make it work I created an sbatch job named ipy_srv.sbatch which launched the server somewhere on a machine in the cluster and then printed the serving machine's ip and port number to the log file. I could then use those values with the ssh tunnel.
#!/bin/sh
#SBATCH --part=westmere
#SBATCH --reservation=energy
#SBATCH --ntasks=1
#SBATCH -t 04:00:00             # max runtime is 4 hours
#SBATCH -J  ipy_server    # name
#SBATCH -o log/ipy-%J.out

let ipnport=($UID-6025)%65274
echo ipnport=$ipnport

ipnip=$(hostname -i)
echo ipnip=$ipnip

module load python
ipython notebook --ip=$ipnip --port=$ipnport --no-browser
I don't know where "($UID-6025)%65274" came from, but it seems to get the job done so I just left it. After launching this with sbatch ipy_srv.sbatch, I can check in the most recent file under log/ipy-* to get the ip and port number at the top of the file.
Next simply ssh into the cluster of your choice while using the tunnelling flag -L. You'll probably need to add your credentials
ssh -N username@midway.rcc.uchicago.edu -L <local port>:<server ip>:<server port>
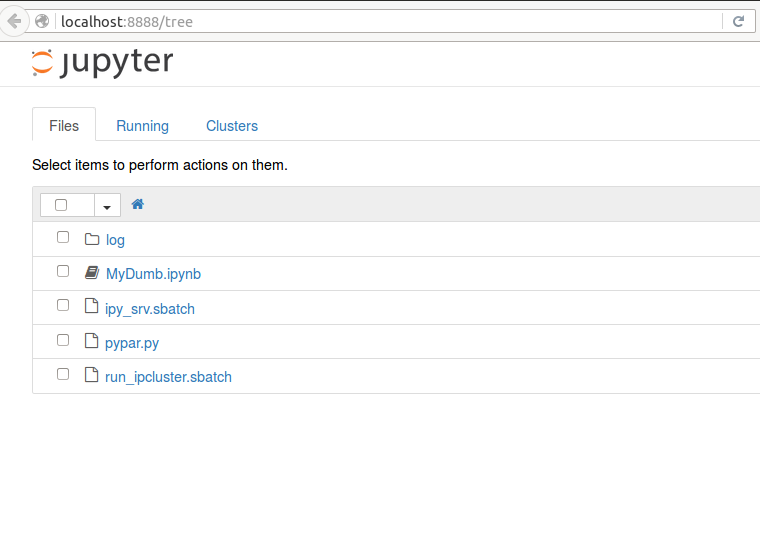
I just used <local port>=8888 so that I could connect to http://localhost:8888/tree like I normally do when serving the notebook on my local machine. And voila... the ipython notebook interface pops up when you navigate your web browser to that address.
You can stop here if you only want to host your notebooks on a cluster as a server, but of course using a cluster means you can do so much more because you can run things in parallel. Keep going to see how that works.
Running the cluster with parallel jobs
To make things slightly more confusing, but also much more useful, I wanted to run a parallel cluster for my ipython notebooks. This really broke down to two steps:
- Setting up an ipcluster to run on a set of nodes
- Getting ipython notebook server to send jobs to the ipcluster
Setting up an ipcluster
This part can theoretically be carried out in a number of ways, but in practice I found that only one way actually works with SLURM as your backend. In particular, I found it very troublesome to use any of the "automatic" setup systems, like ipcluster or ipython_cluster_helper. They didn't play nicely with the SLURM configurations that I was working with so I wrote a script that directly launched the underlying tools, ipcontroller and ipengine.
The script I used based largely on examples I found from Sebastian Pölsterl, twiecki and FSU's RCC. After the SBATCH setup info, it accomplishes three things:
- Delete all old ipython profiles and create a new one for this ipcluster
rm -r ~/.ipython/profile_job*
profile=job_${SLURM_JOB_ID}

echo "Creating profile ${profile}"
ipython profile create ${profile} - Launch an ipcontroller that can connect to any IP using this profile
ipcontroller --ip="*" --profile=${profile} & - Launch as many ipengines as needed (60) that will connect to the ipcontroller at $(hostname)
srun ipengine --profile=${profile} --location=$(hostname)
After you run this script using sbatch run_ipcluster.sbatch, SLURM will return a job number that you will need to use later. To see what this is doing behind the scenes you can view the output in the appropriate log/ipc-* file. You'll essentially see the ipcontroller come online and then you'll see a bunch of updates as each ipengine makes contact with the ipcontroller. However, at this point we really haven't accomplished anything because all those ipengines are still waiting for work to do.
Connecting to your parallel ipcluster
To actually use the ipengines we set up, we have to use the special parallel programming utilities housed in IPython.parallel. Technically, we're supposed to use ipyparallel now, and I recommend using that if you know how. At the time of writing this though, ipyparallel needs to be installed separately and most of the examples I've found used IPython.parallel so I didn't feel like crossing those hurdles for my set up.
IPython.parallel doesn't have to be used with Jupyter notebooks, and, in my opinion, combining the two makes things a little difficult to understand at first. To make things easier, I'll introduce the script based method first and then show the tricks for using it in a notebook.
Running a standalone script
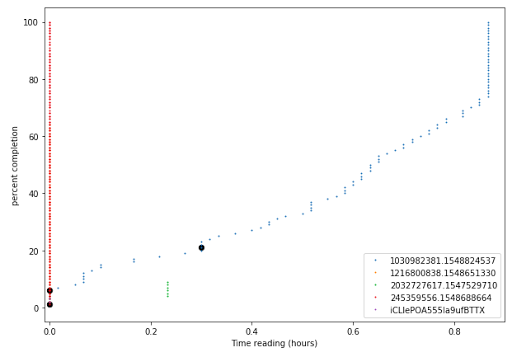
For a quick test to make sure that the cluster is actually functioning at all, you can run the pypar.py test. This code generates an estimate of Π from a large "dartboard" simulation so the accuracy should increase with more machines being used.
To run this using the parallel cluster, pass the profile name to the script.
$ module load python
$ python pypar.py -p job_<jobn>
<jobn> is the job number returned by SLURM when you submitted run_ipcluster.sbatch earlier. When the script finishes there should be a file called result-job.txt, which will include a pretty OK estimate of Π. I'm not going to get too deep into how how to actually do parallel programming in Ipython, but here are some tutorials and examples to get you started working with that.
- https://ipython.org/ipython-doc/3/parallel/parallel_demos.html
- http://nbviewer.jupyter.org/github/minrk/IPython-parallel-tutorial/blob/master/examples/Parallel%20image%20processing.ipynb
- http://minrk.github.io/scipy-tutorial-2011/basic_remote.html
Connecting your notebooks to the cluster
Using IPython.parallel inside the Jupyter notebook isn't that much trickier than in a python script. There are a few tricks that are covered in twieki's post, but I'm not sure if that's exhaustive. Just as an example, I've included the somewhat useless dummie_notebook.py to get you started. It performs some calculations and outputs to the file to simpleoutput.txt. To make it work, you'll have to update the profile referenced when setting up the parallel.Client() so that it matches the job name of returned when you launched run_ipcluster.sbatch.

If everything is set up correctly you should just get the range of numbers from 1 to 10,000 in the simpleoutput.txt file. You can make sure that the job actually ran in parallel by checking the corresponding log/ipc-* file to make sure that a ton of communications started getting printed to file.
Future directions and get the code
This setup should prove to be very useful to me and I hope it will be to you too. You can get all the code from my ipynb-par-slurm repo on Github. In the future, I think it should be possible to extend this method to work with other libraries that support parallelism, but I'm just scratching the surface of those challenges right now. I may update the github repo to include other examples that work with more packages if that turns out to be possible. Happy parallelizing,