 will stedden
Solar Electrical System on Ioni
Daughters of Nereus, resident in caves, merged deep in sea, sporting through the waves;
whose forms half wide are nourished by the deep, leaping and wandering through the liquid sea.
Bright, watery dolphins, sonorous and gay, well-pleased to sport with Bacchanalian play;
Nymphs beauteous-eyed, whom sacrifice delights, give plenteous wealth, and bless our mystic rites;
Orphic Hymn 24 to the Nereides c. 300 BC
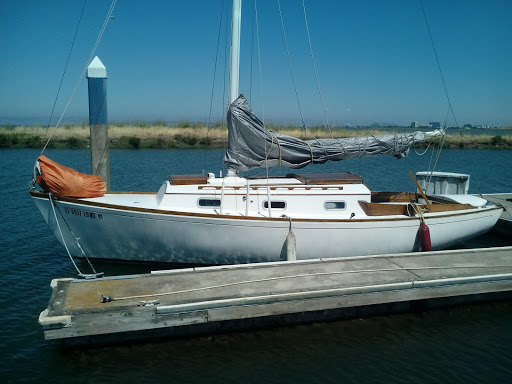
I'm currently in the process of fixing up my vintage Dolphin 24 sailboat, Ioni. This post covers my foray into marine electrical. I'm mostly writing this so I can laugh at myself a year from now, when everything goes horribly wrong. ¯\_(ツ)_/¯
Ioni's Electrical Systems
There are basically three essential electrical systems on Ioni.
- Auto bilge pump
- Running lights
- Radio
The bilge pump is to keep any small leaks or rain from sinking her while I'm away. The running lights are needed for any nighttime sailing. The radio is probably not necessary for bay sailing, but it would be a little irresponsible to not set it up. By the end of this all of these will be running off of this 12 volt car battery.

Finally, a battery won't last forever so there needs to be some system to recharge it. I would personally prefer to not need grid electric in my life ever, but as that isn't possible, I at least want to be able to take this small isolated system off of it. Therefore, I'm going to be pursuing solar photovoltaic for recharging the battery.
Basic electrical setup
Before I set up the solar system, I focused on making sure all the electrical systems were working directly off battery. Ioni's electrical setup is pretty simple. Below is a diagram of all the main electrical equipment I built.
The wiring itself is set up to run through this junction box. One side is positive and the other negative.

Most of the equipment runs through this set of switches, which are hooked up to their own fuses. I also ran a larger breaker across the main battery terminal just in case of short to prevent the auto battery from running hundreds of amps and melting itself.

One component that doesn't run through the set of switches is the automatic bilge pump. I could have run the bilge pump through the switches, but I decided to avoid that since I wanted to make sure no one ever accidentally shut it off. The wiring setup for the bilge pump was particularly easy, and just involved connecting the positive end to the float switch line on the pump. This float switch turns on whenever the bilge pump gets significantly covered in water.

Radio
The radio was the first thing I connected. It was very straightforward. Just connect the black wire to the negative on the battery and the red to the fuse/switch, which connects to the battery positive terminal. The antenna runs up the mast as well.

Lighting
The lighting was a slightly more complicated setup, but all fairly straightforward once I understood the wiring setup. Fortunately, the wiring for all the lighting was already run, I just had to decipher which lighting element was which. The cabin lights and running lights are each in parallel so that if one goes the rest will work fine. I'd assumed this would mean individual lines for each, but instead, there was just a pair of ground connections and then an individual hot for cabin and running lights. The hots needed to be attached to the switch.
The light in the V-berth had a broken switch that I needed to open up and break apart from the inside to reattach.

Similarly, I had to repair the interior of the main cabin light because the connections were faulty. I dismantled and reconnected it, and then swapped the original bulb with a low power LED. There was also a light in the V-berth that had a jammed switch that needed to be taken apart for repair.


I replaced the running lights with LED bulbs as well. Running lights are designed to be green to starboard, red to port, and white on the stern. The wire leading to the rear white light was cut so I reextended it.

Finally, the light up the mast was disconnected, which was a good thing, since the casing for that light was missing too. When I bring the mast down for transportation to the drydock for repairs, I'll replace that light. For now, I'll do without.
Solar
The really interesting part was the setup of the solar system, though again it was surprisingly easy once I got past my fear of lighting something on fire. The truth is the current was limited to about 2 Amps so the chance of a fire is really zero. Still, using too small a gauge wire could have led to some overheating perhaps so it was good that I used 12 gauge stereo installation wire.

Setup was really just as simple as attaching the voltage regulator to the battery, then to the solar panels, and finally to the load. I really think anyone could set up a solar panel system this simple.

The monitoring on the charge controller is so helpful as it gives an update on the voltage state of the battery as well as input and output currents. Even when quite cloudy the solar panel can bring in 0.1 A and at full brightness 1.8 A.

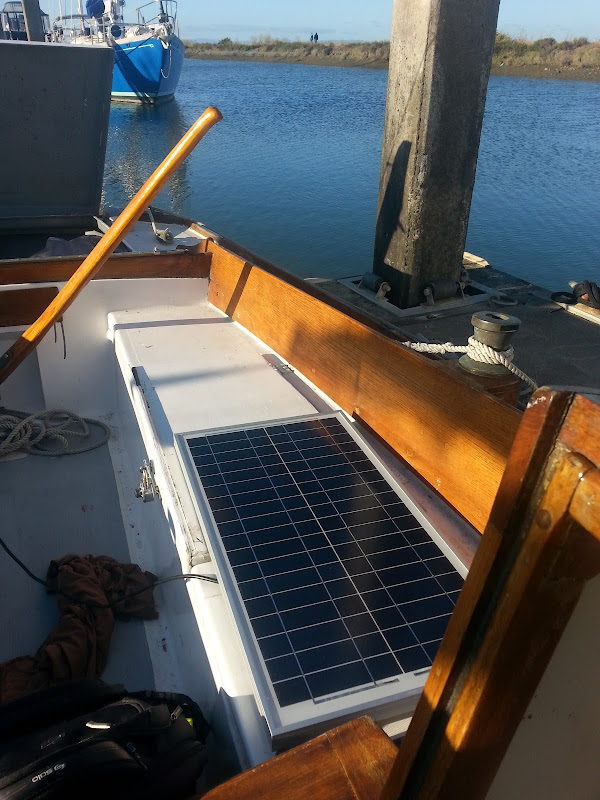
I ran the wiring to the exterior solar panel through the motor exhaust port at the stern. To begin, I just tested the panel by propping it up in the cockpit of the boat. I wanted to ensure that the charge controller really would limit the voltage when unsupervised to prevent degassing of the battery when overcharged. Indeed after getting up to 14.3 V for a few minutes it would normally top out and move to trickle charge mode, where it held at approx. 13.1 V indefinitely. I left plenty of extra wire to extend the panel where I need it, but I expected to cut that down when I found a more permanent position.

I installed the charge controller on the panel near the door so that I could keep an eye on the charging voltages for now. I attached it with one screw so that I can take it off soon and affix it to the top paneling in a less conspicuous place.

One great feature of the charge controller is the USB lines, which I can now use to charge small devices.
The Mount
To allow me to move the panel out of the way and to avoid disrupting woodwork and fiberglass I decided not install the panel. Instead, I simple prop it up on the side whenever I need to charge. Then when we take it out to sail, I place it in the cardboard and slip it back under the cockpit.
Next steps
There are a few other electrical devices that I might want to add, but at the moment I worry about them drawing too much power for the little battery I have. I have a DC trawling motor that I would love to set up, and I've put together an attachment for a small Peltier cooler. Both of those drain the battery fast so I'll probably need to devise a double battery setup before I can use them. That way even if those drain the energy, I can have a backup to run emergency power for the radio and bilge pumps.
All in all, the electrical turned out to be quite a bit easier than I thought. It was a good starter before I move onto the next big challenge: plumbing.