 will stedden
Solar Wagon: tandem ebike and solar charging trailer
building a solar powered tandem ebike for my partner and I to go adventuring
My partner and I have dreamt of #VanLife for years, but I always worried about the awful carbon footprint of living on the move. A dream incubated in my head for a long while to make that lifestyle work in a downsized, ecologically conscious way. This past winter, I finally put together the pieces on this most ambitious project of my life thus far: a tandem electric bike with a solar charging trailer filled with all the essentials for life on the road.
The goal of the solar charging trailer was to be able to carry all of the amenities that would make a bikepacking life viable long term. In this post, I'm going to cover some details of building our tandem ebike and solar charging trailer as well as our co-op economy documentary trip we are planning for this summer.
Electric tandem bike
Building an electric bike is easy in this day-and-age, and adapting this process to a tandem bike didn't really add much complication. >We purchased a used 1980s era steel framed Kuwahara tandem bike off of craigslist for $250 and did an electric conversion ourselves.
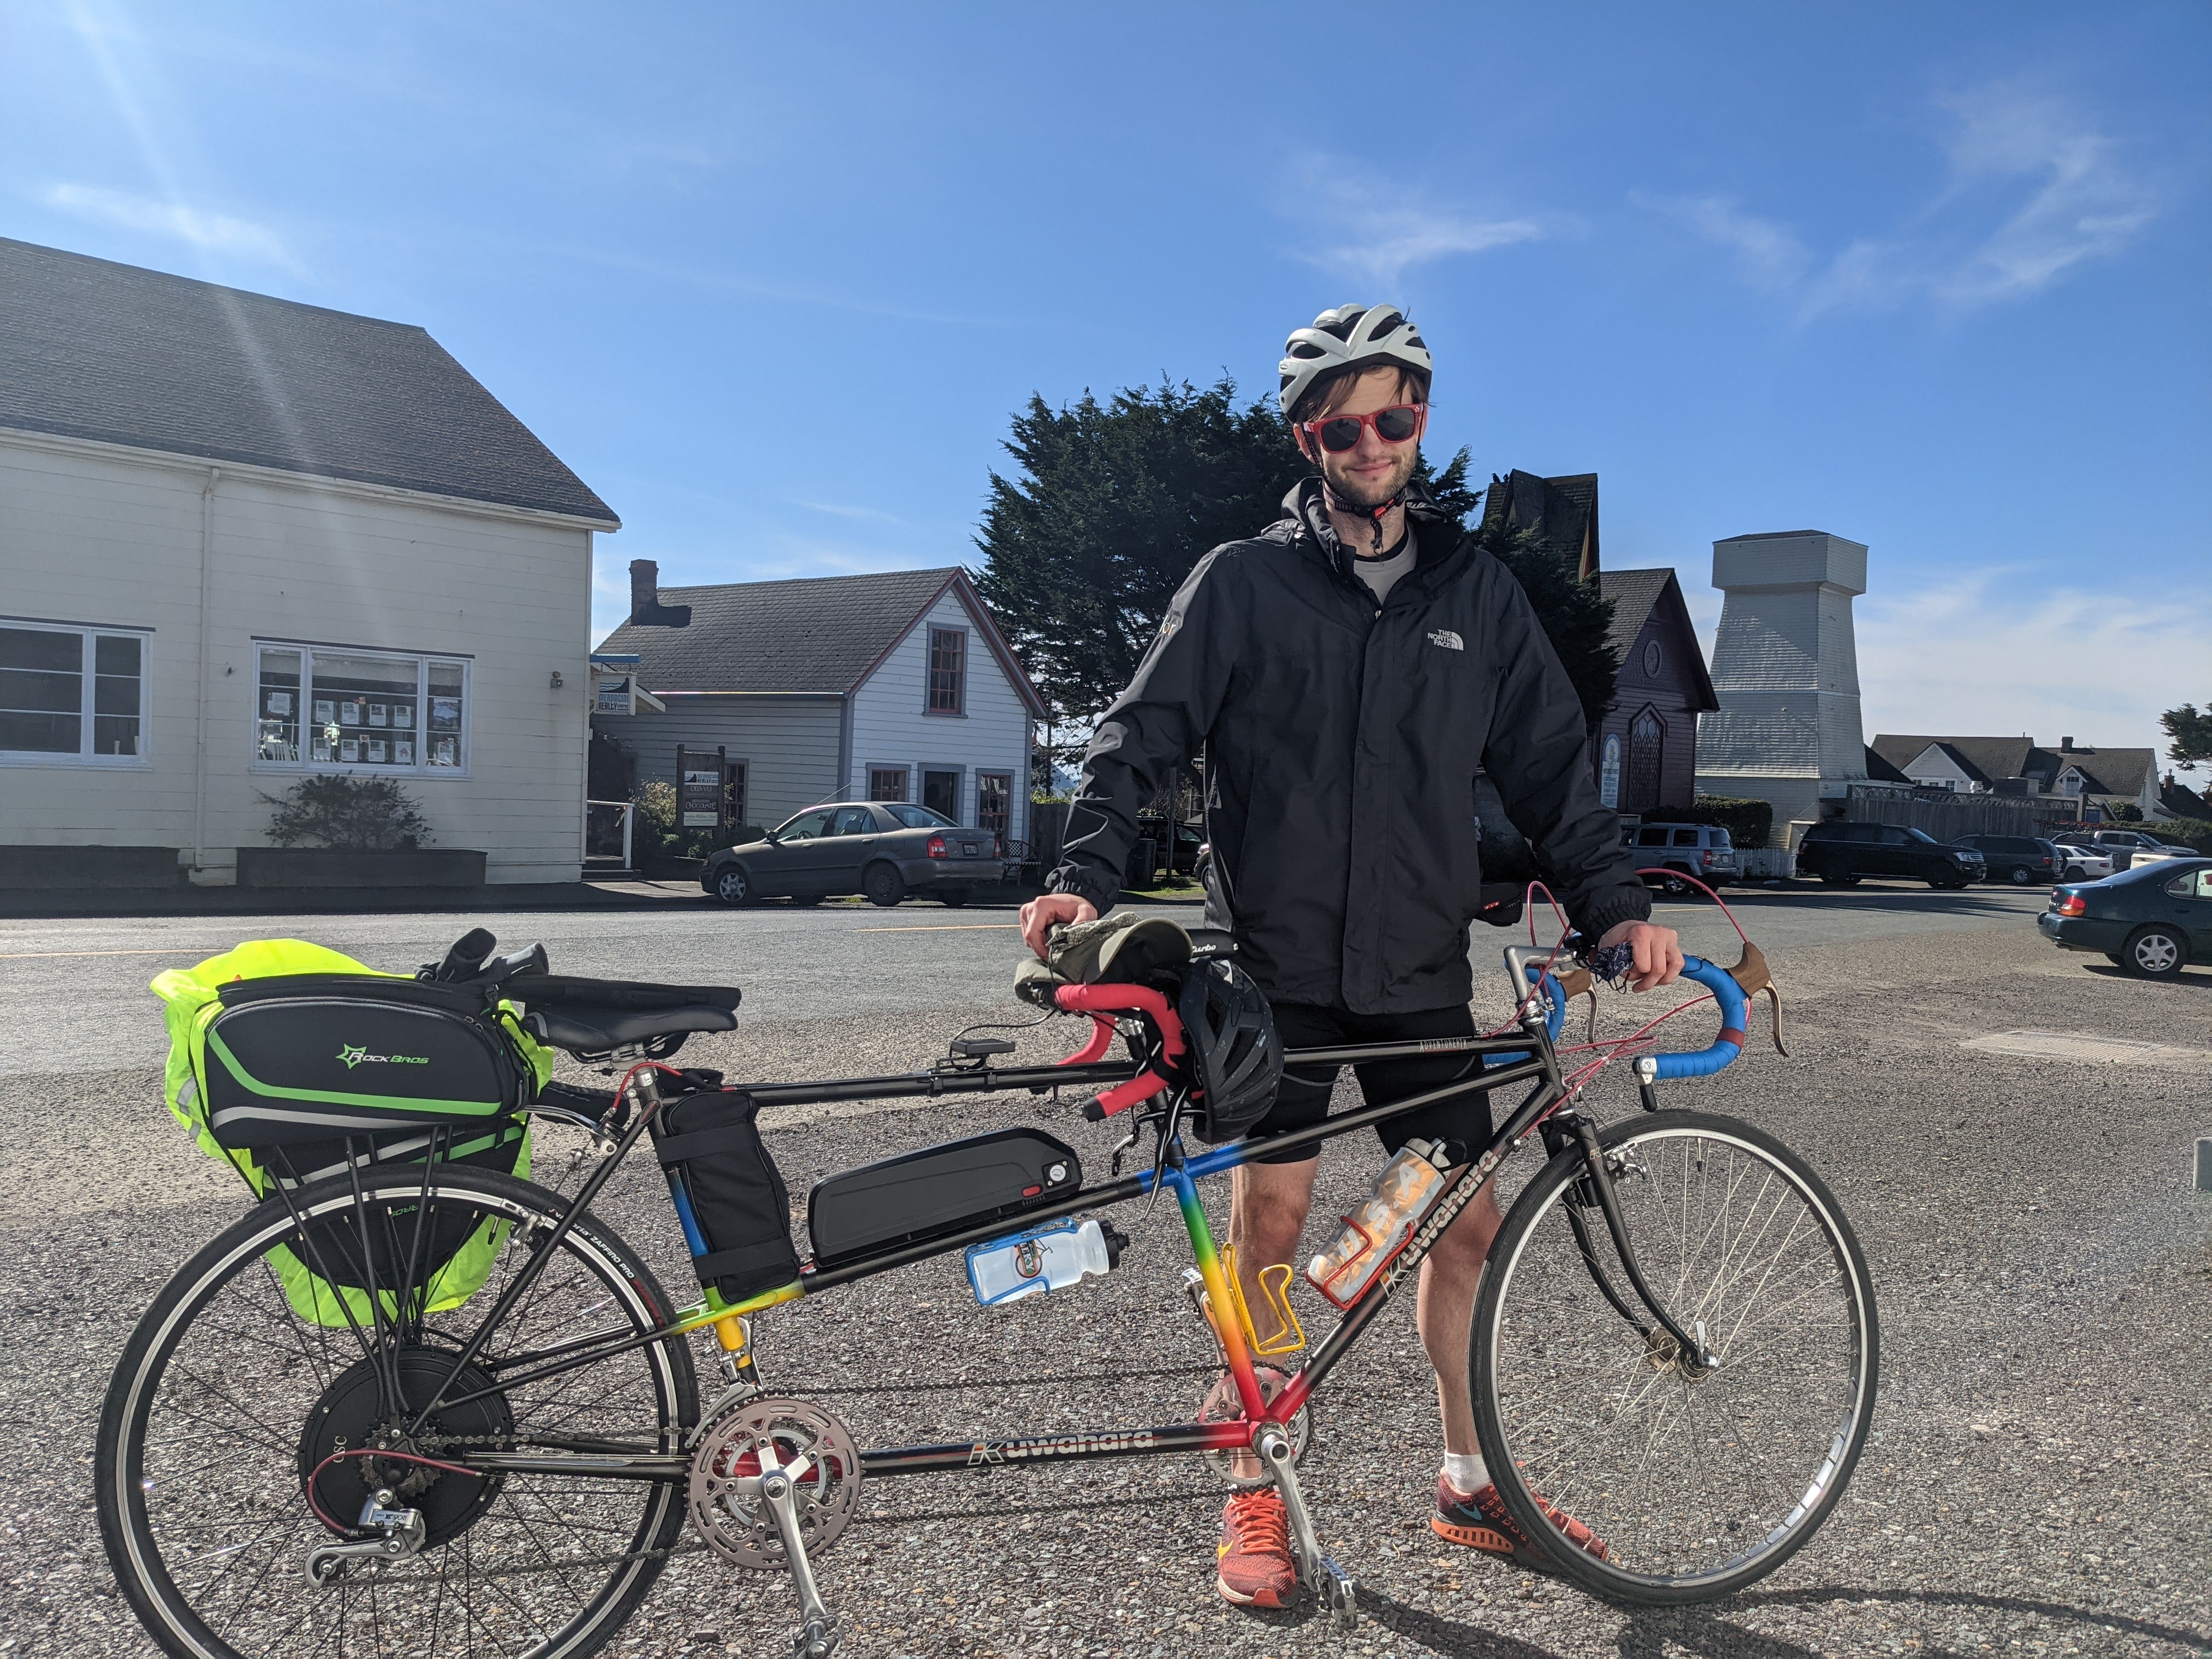
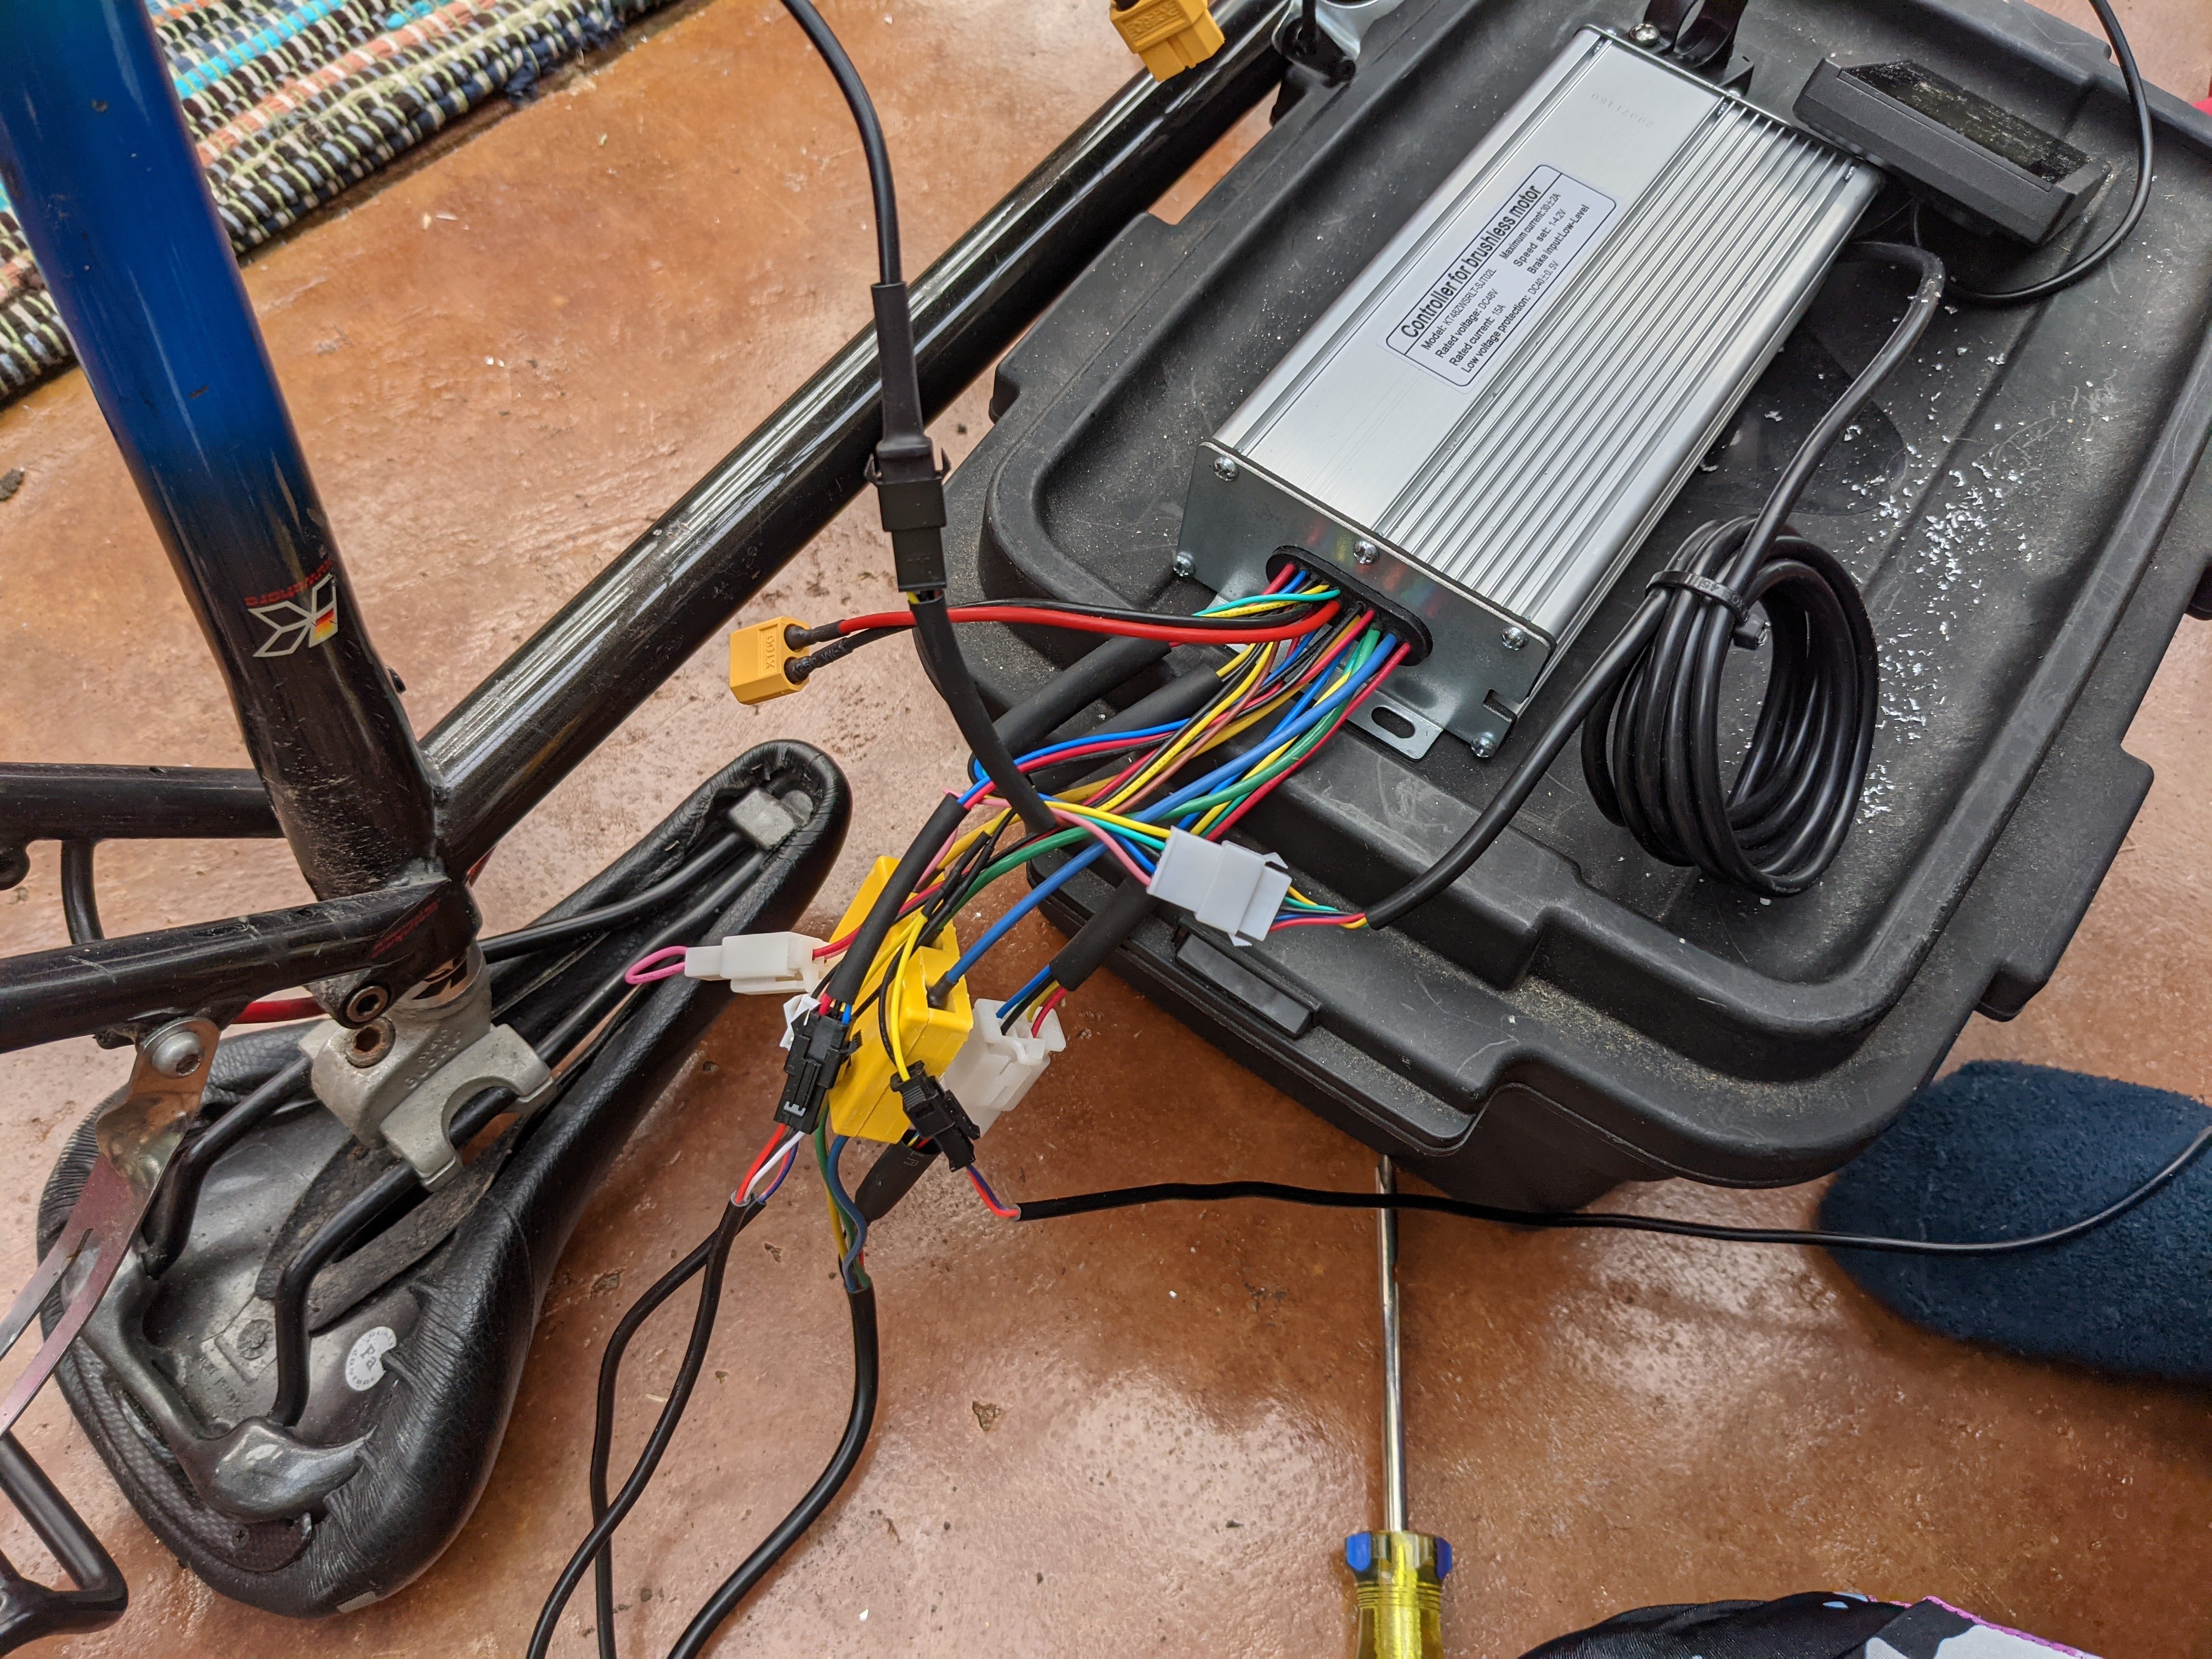
On ebay there are standard ebike conversion kits, which are pretty straightforward to install. The components cost around $300, and included electric motor mounted in rear wheel, motor controller and display, pedal sensor for the pedal assist, and handlebar brakes to engage the regenerative braking. In addition we bought two 48V 17.5 Ah ebike batteries for $450 a piece.

We needed to replace tires and tubes, and add lights and an extra speedometer. We also added panniers to carry additional load, and in the back we built our own rudimentary solar water heating system.

The great part about running the ebike controls on a tandem is that you can divide up the labor to have one person steer while the other manages the controls and navigates. It takes a little more communication, but it makes it possible to make adjustments and search for things without stopping.
We already had a decent amount of biking equipment to outfit the bike so we were repurposing some things. But including everything that went into it, we estimate the etandem setup cost us $1600.
Solar charging trailer
The real work came in our solar trailer. We wanted to be able to carry all the equipment we need for backpacking in various conditions, for surviving as we passed through cities, and for some digital remote work. Plus, we needed to carry ~2 weeks worth of food for travel by bike and for backpacking as well. The other constraint was being able to recharge one 48V 17.5 Ah battery in approximately 6 hours of sunshine, which equates to 840 Watt-hours.
We built the trailer in two stages by first building a standalone solar mount on the front buggy, and then (after some trial and error) building the second buggy and attaching it.
Panel sizing and design
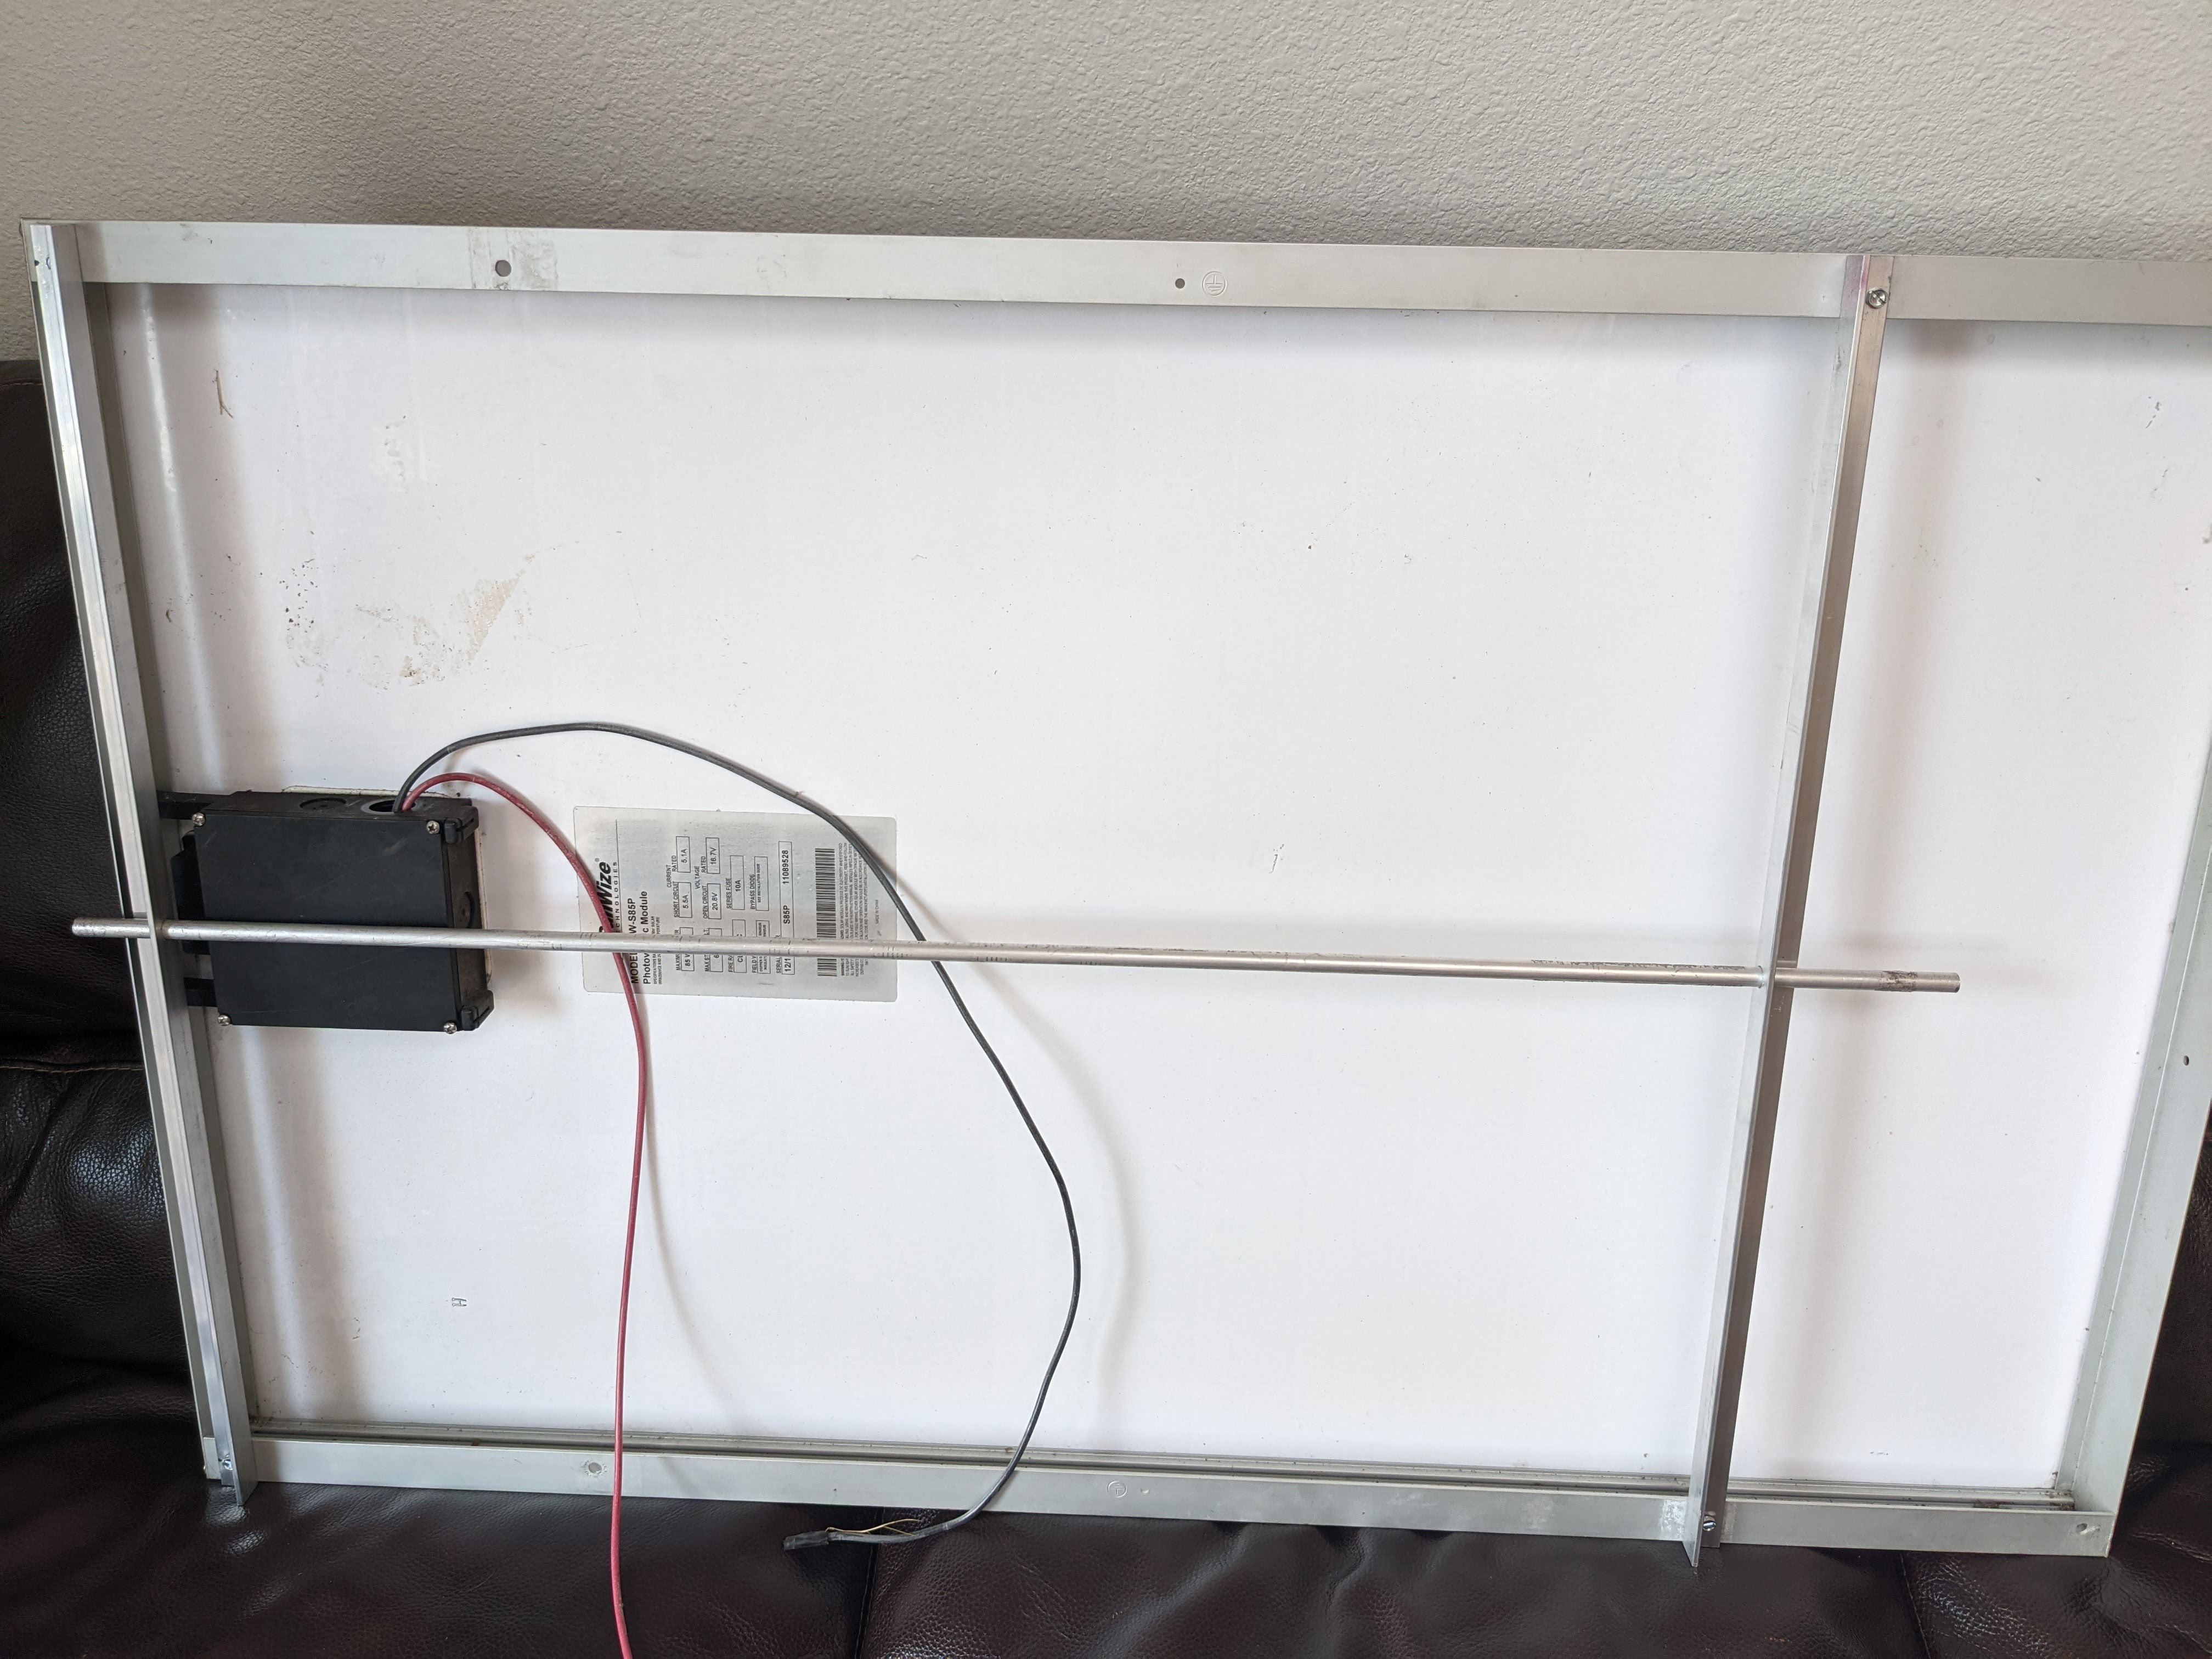
I already had two solar panels which I had purchased with the intention of solar powering my boat. They aren't the most efficient or lightweight solar cells out there, but I can always upgrade as they get older. They are 40x26 inches and 85 Watts. So at 175 Watts together, they should charge the battery at 840/175 = 4.8 hours. Of course, given all the losses in this system I suspect it'll take longer, but that still leaves us with a decent buffer.
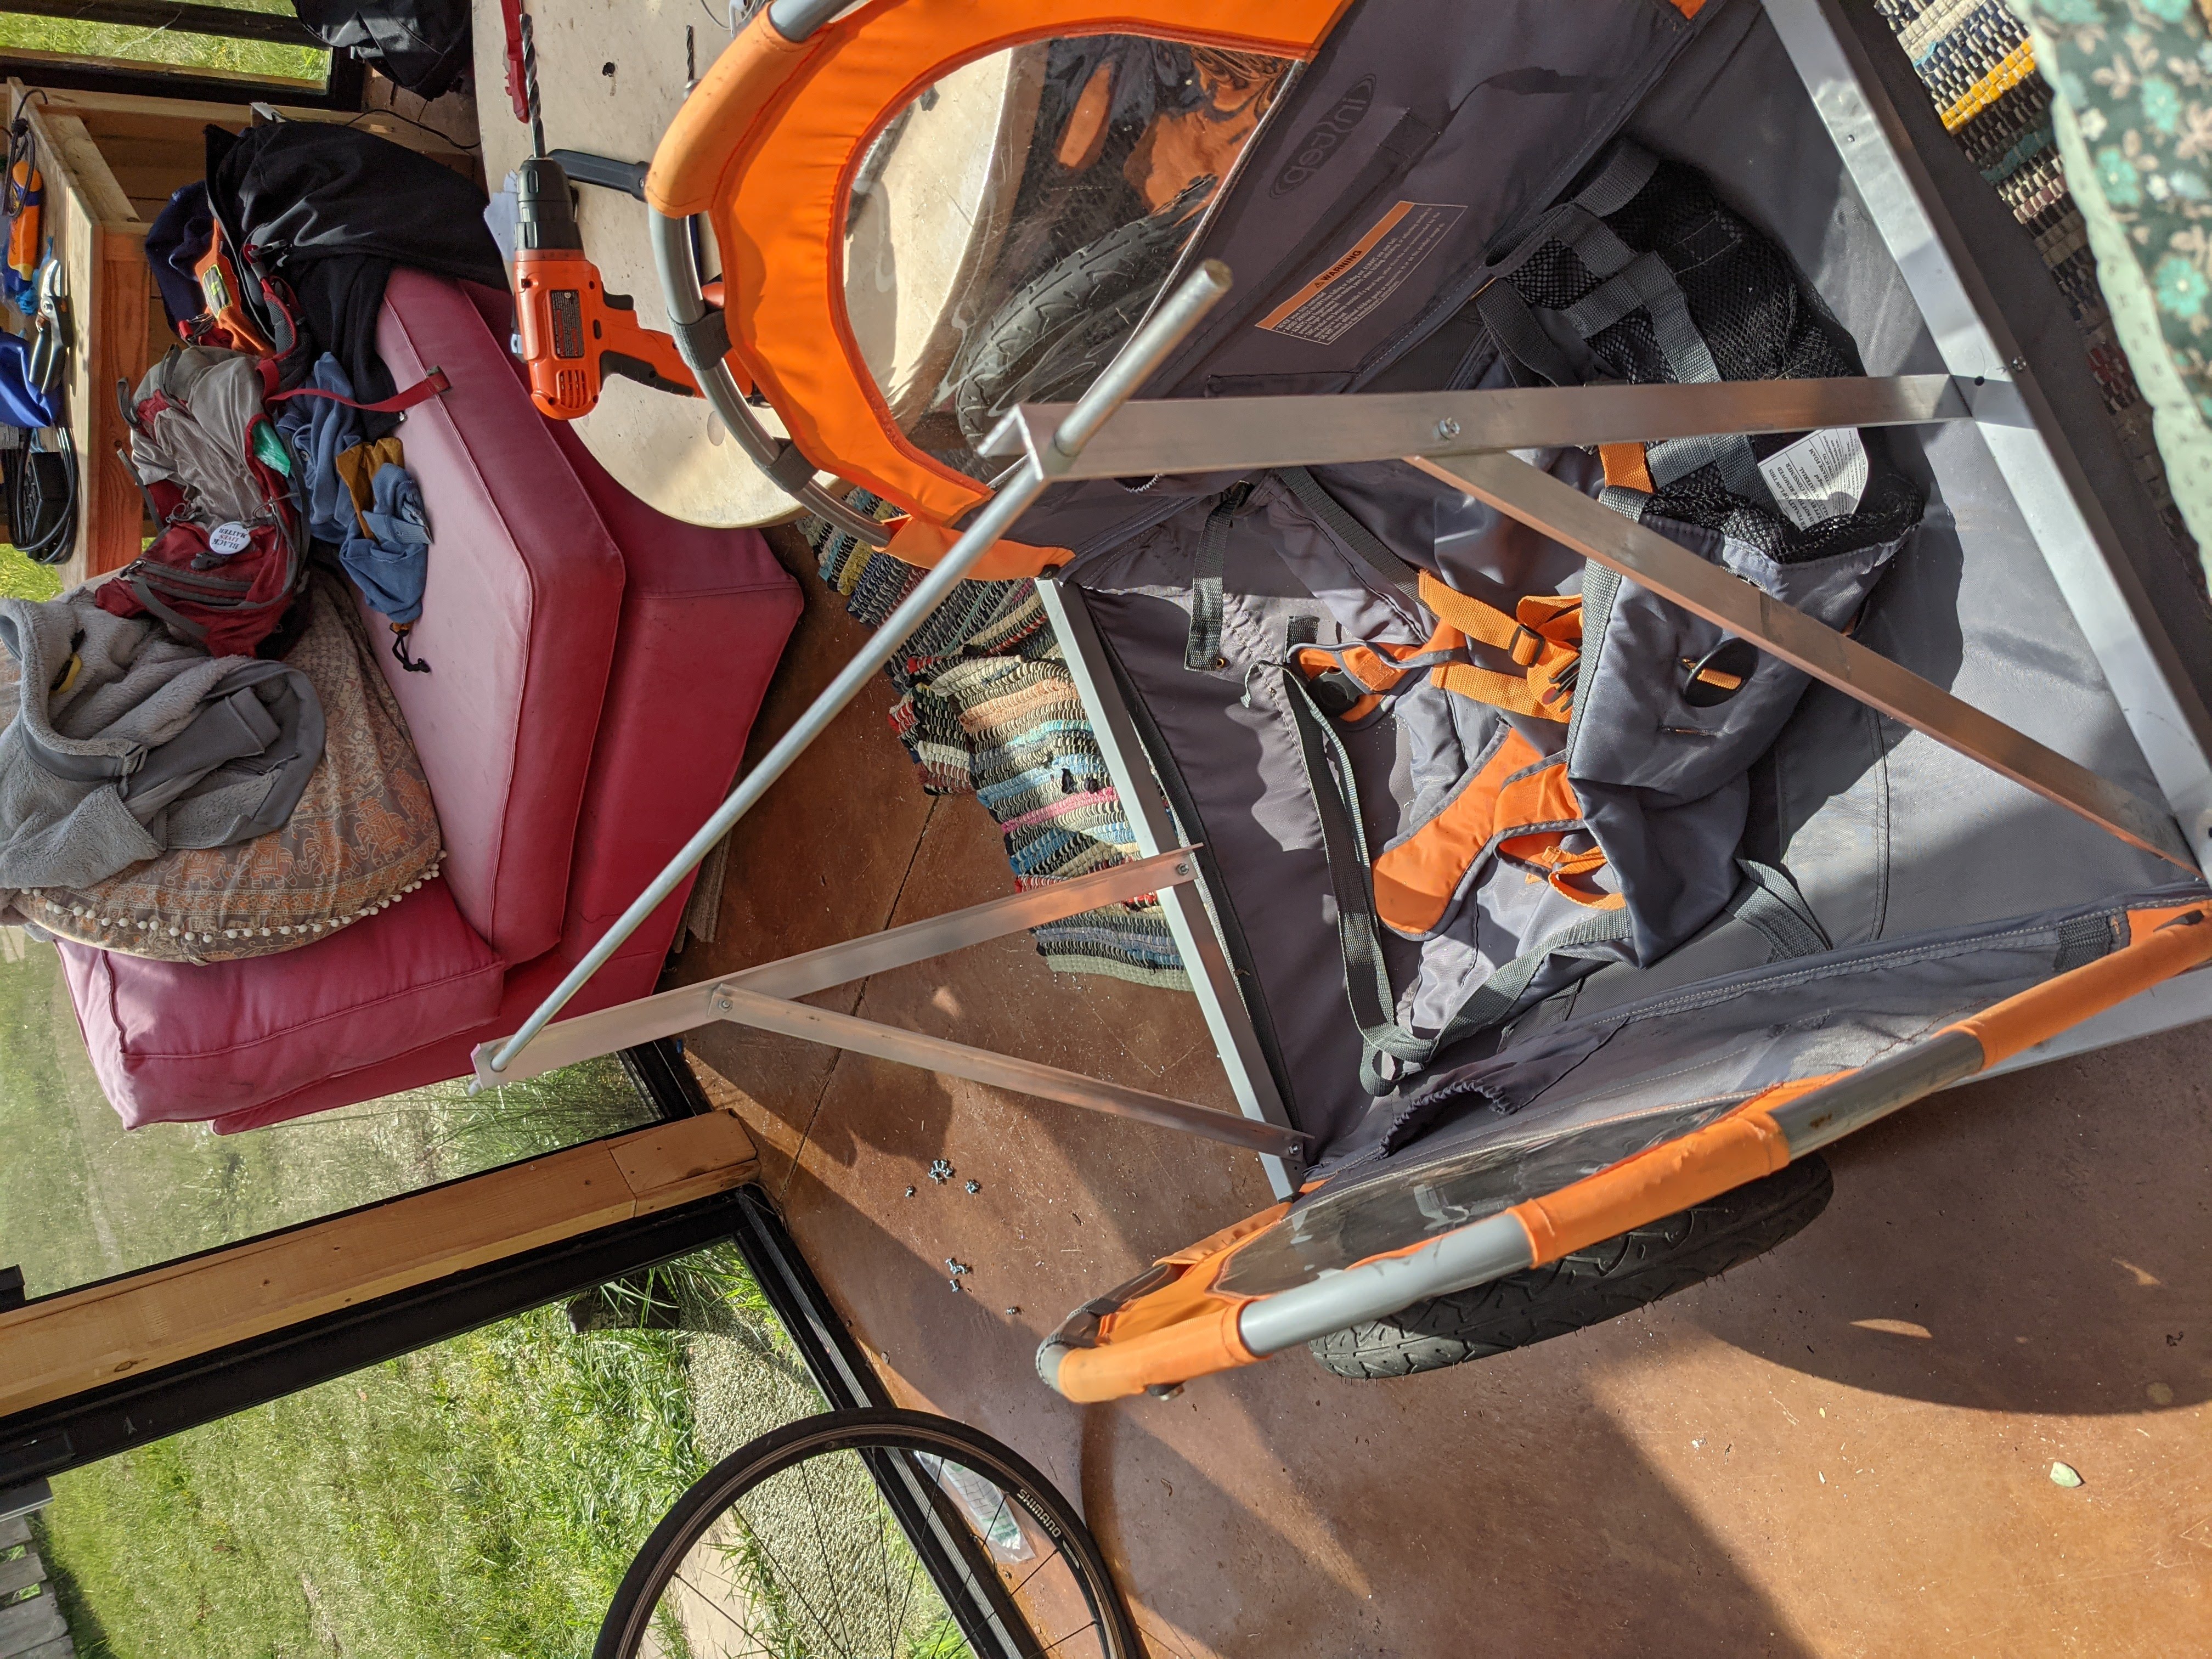
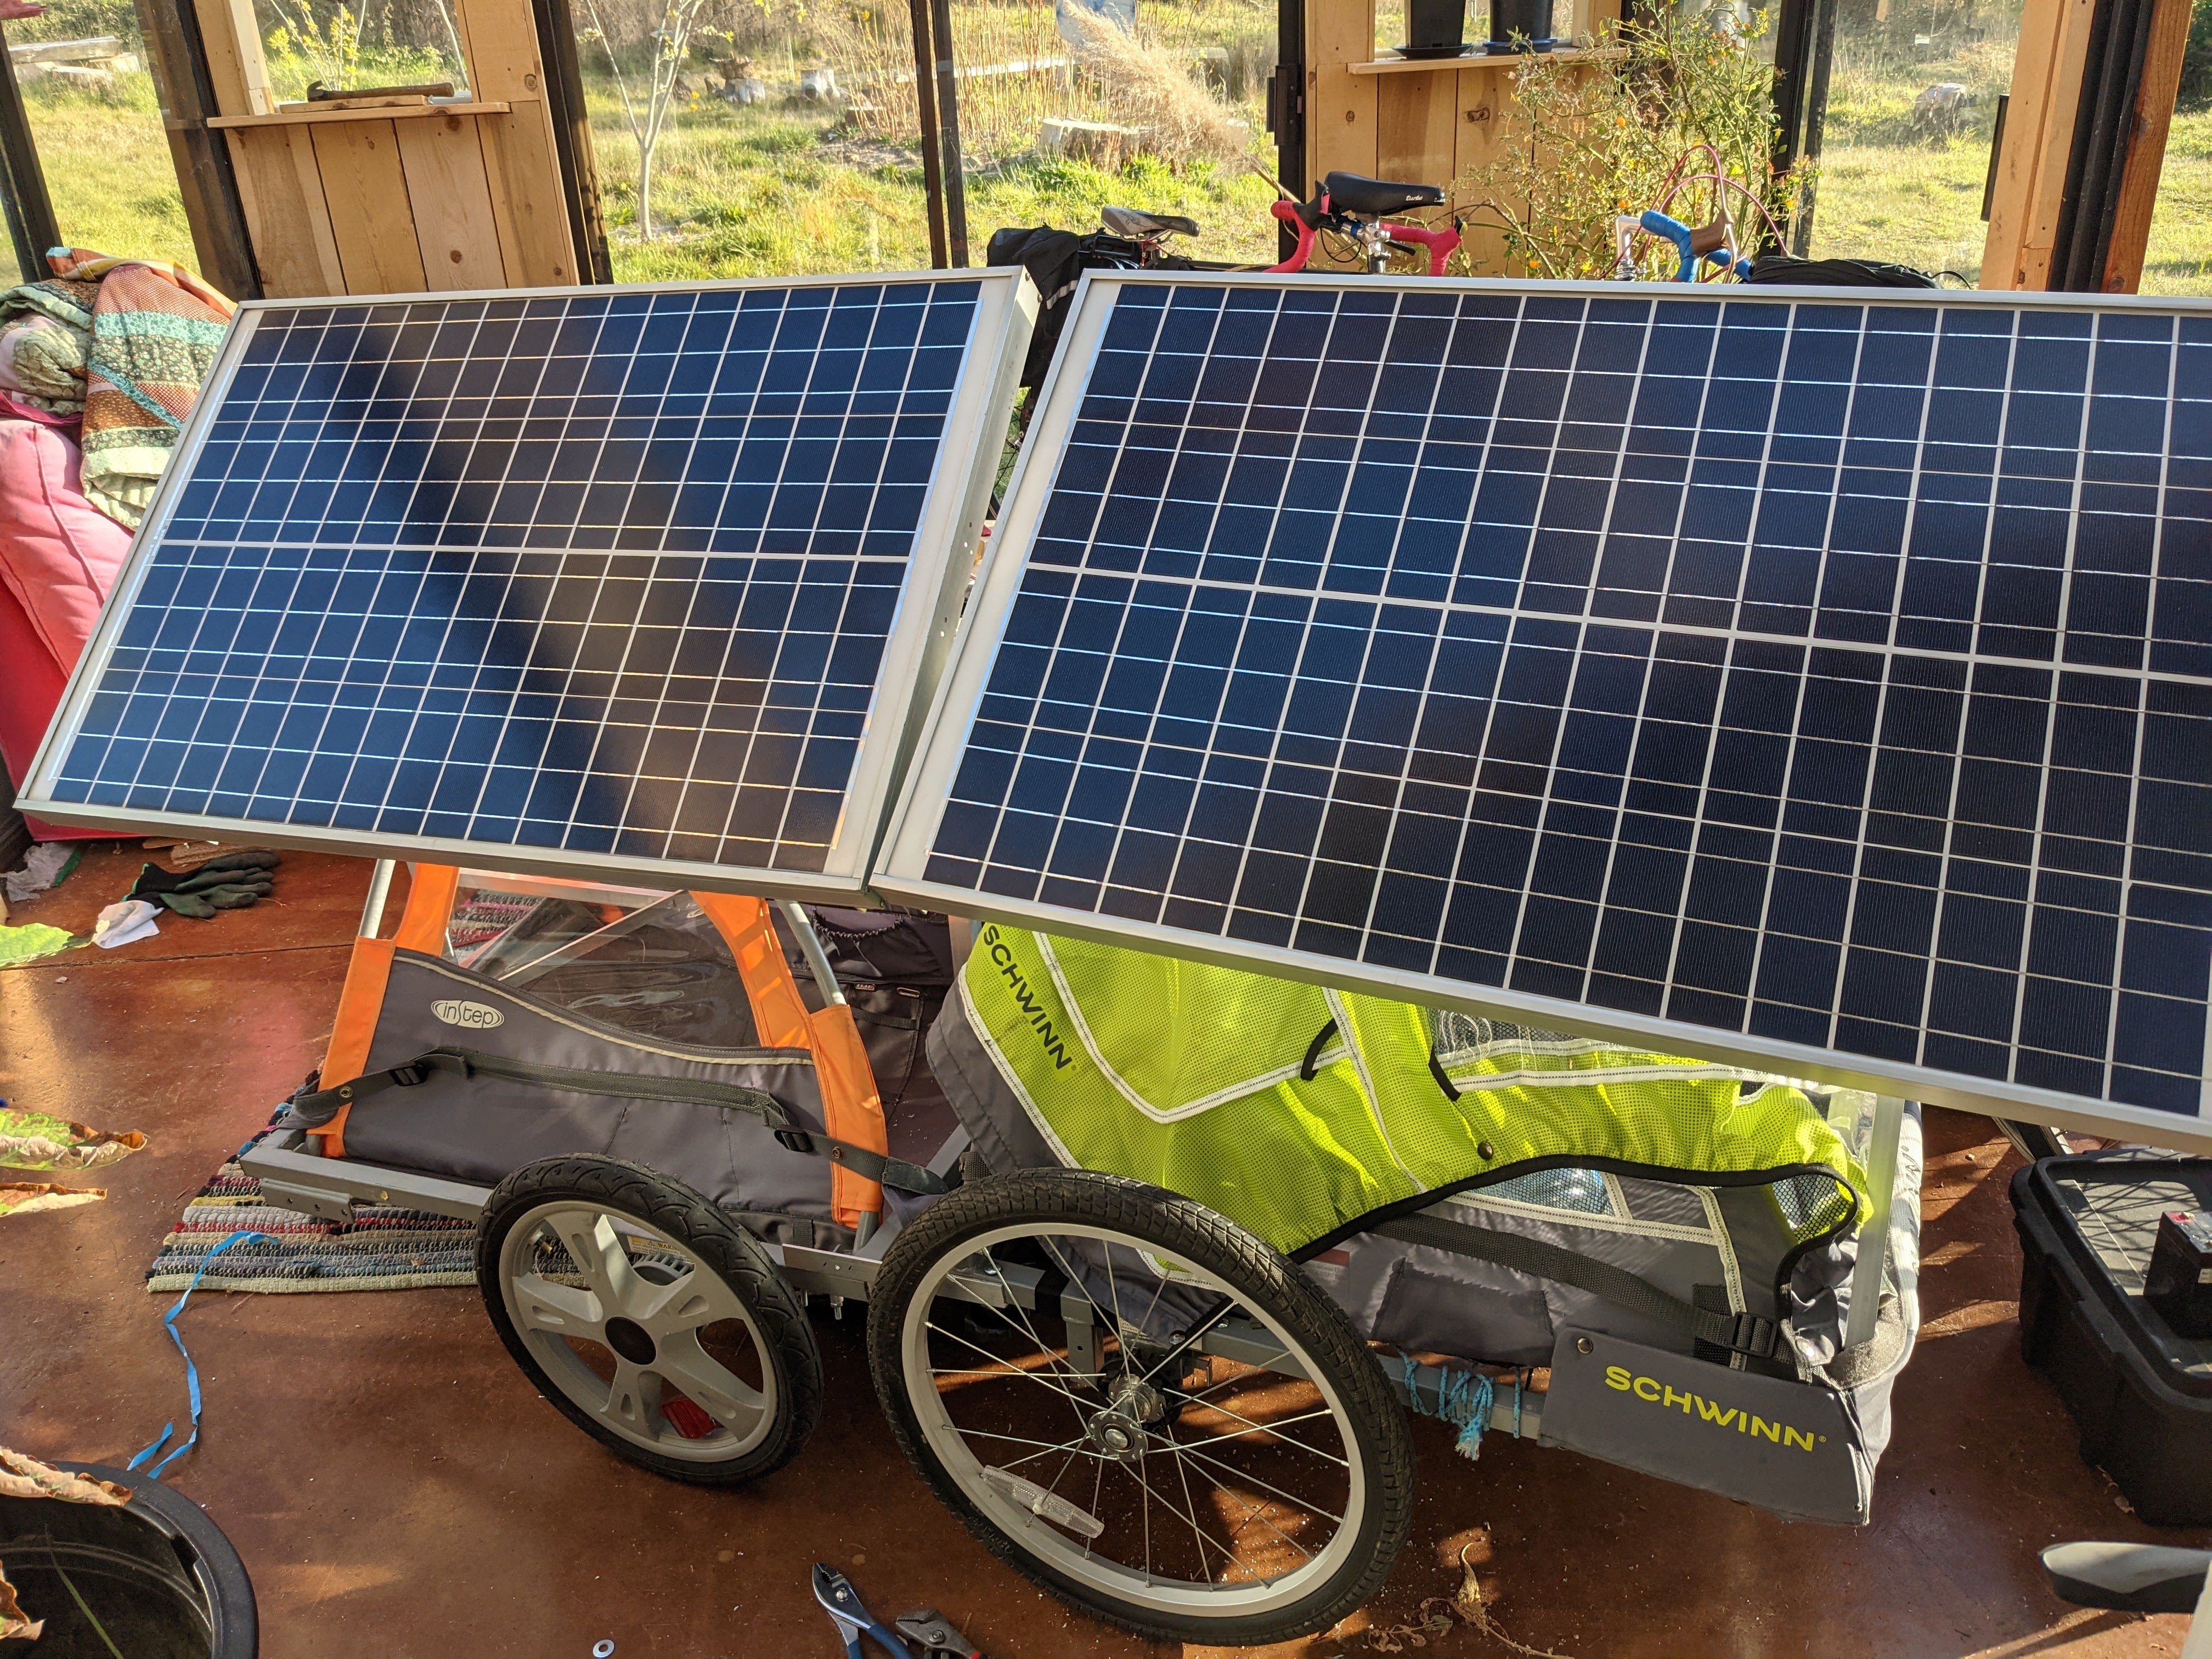
With all the gear and needing two panels end to end, we knew we were looking for a pretty long trailer, larger than the average off-the-shelf trailers for bikes. Claire and I had lots of ideas for how to build the cart itself, but as usual, I didn't want to build from brand new parts so I let the luck of craigslist decide how we would do it. We found two used bicycle baby buggies and decided they could easily be converted by fastening them together.
Solar mount design
One cool invention was the central mounted solar panel design that allows us to rotate the panel in the direction of the sunlight. I used aluminum L brackets. Here are all the parts required for one trailer. Sizing will vary for you depending on how large the trailer and panels are, and how high you want to build.

To start, I made two triangle framed braces, one at the front of the buggy and one at the center, with the bottom of the triangle being the cart frame itself. I ran an aluminum rod through the tops of each brace, connecting them.
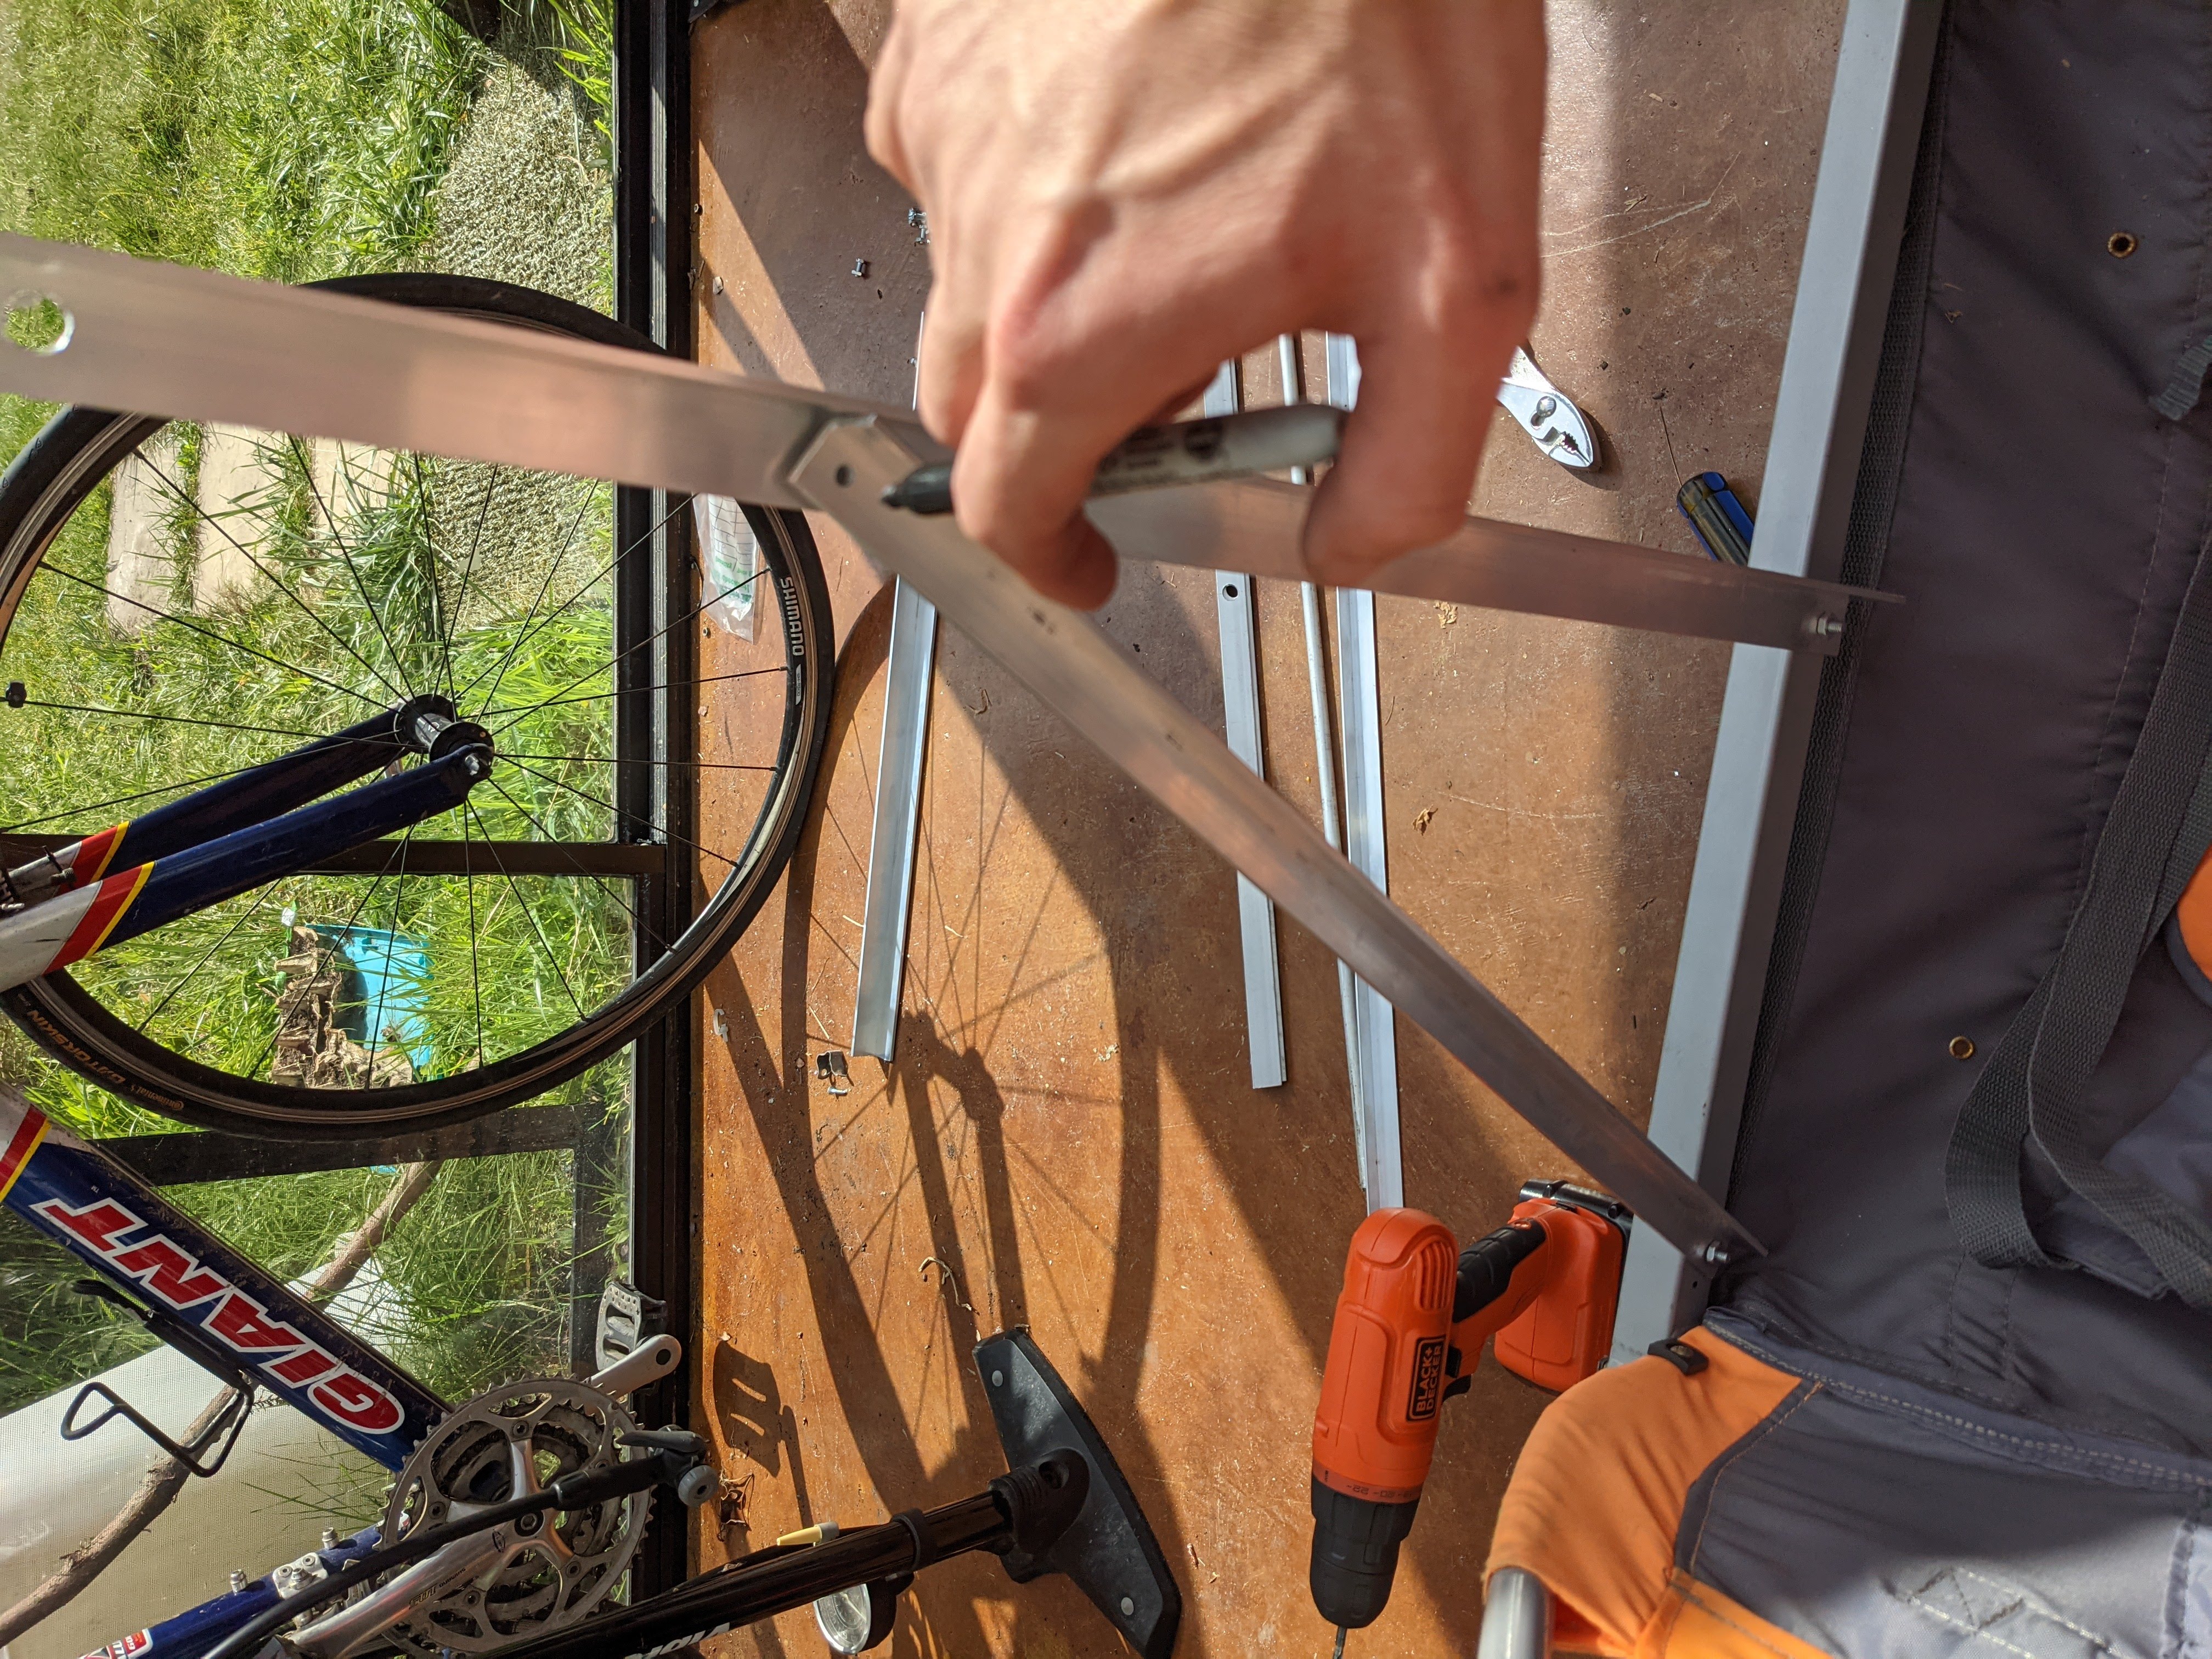
To attach the solar panel to this rod, I attached two more pieces of L-bracket to the underside frame of the solar panel, one across the front and one across the rear, and drilled a hole in the center of each. Then the pole was threaded through. The rod was secured to the panel and triangle braces with cotter pins through the rod, and a few pieces of front to back facing bracing were used to stabilize the whole thing.
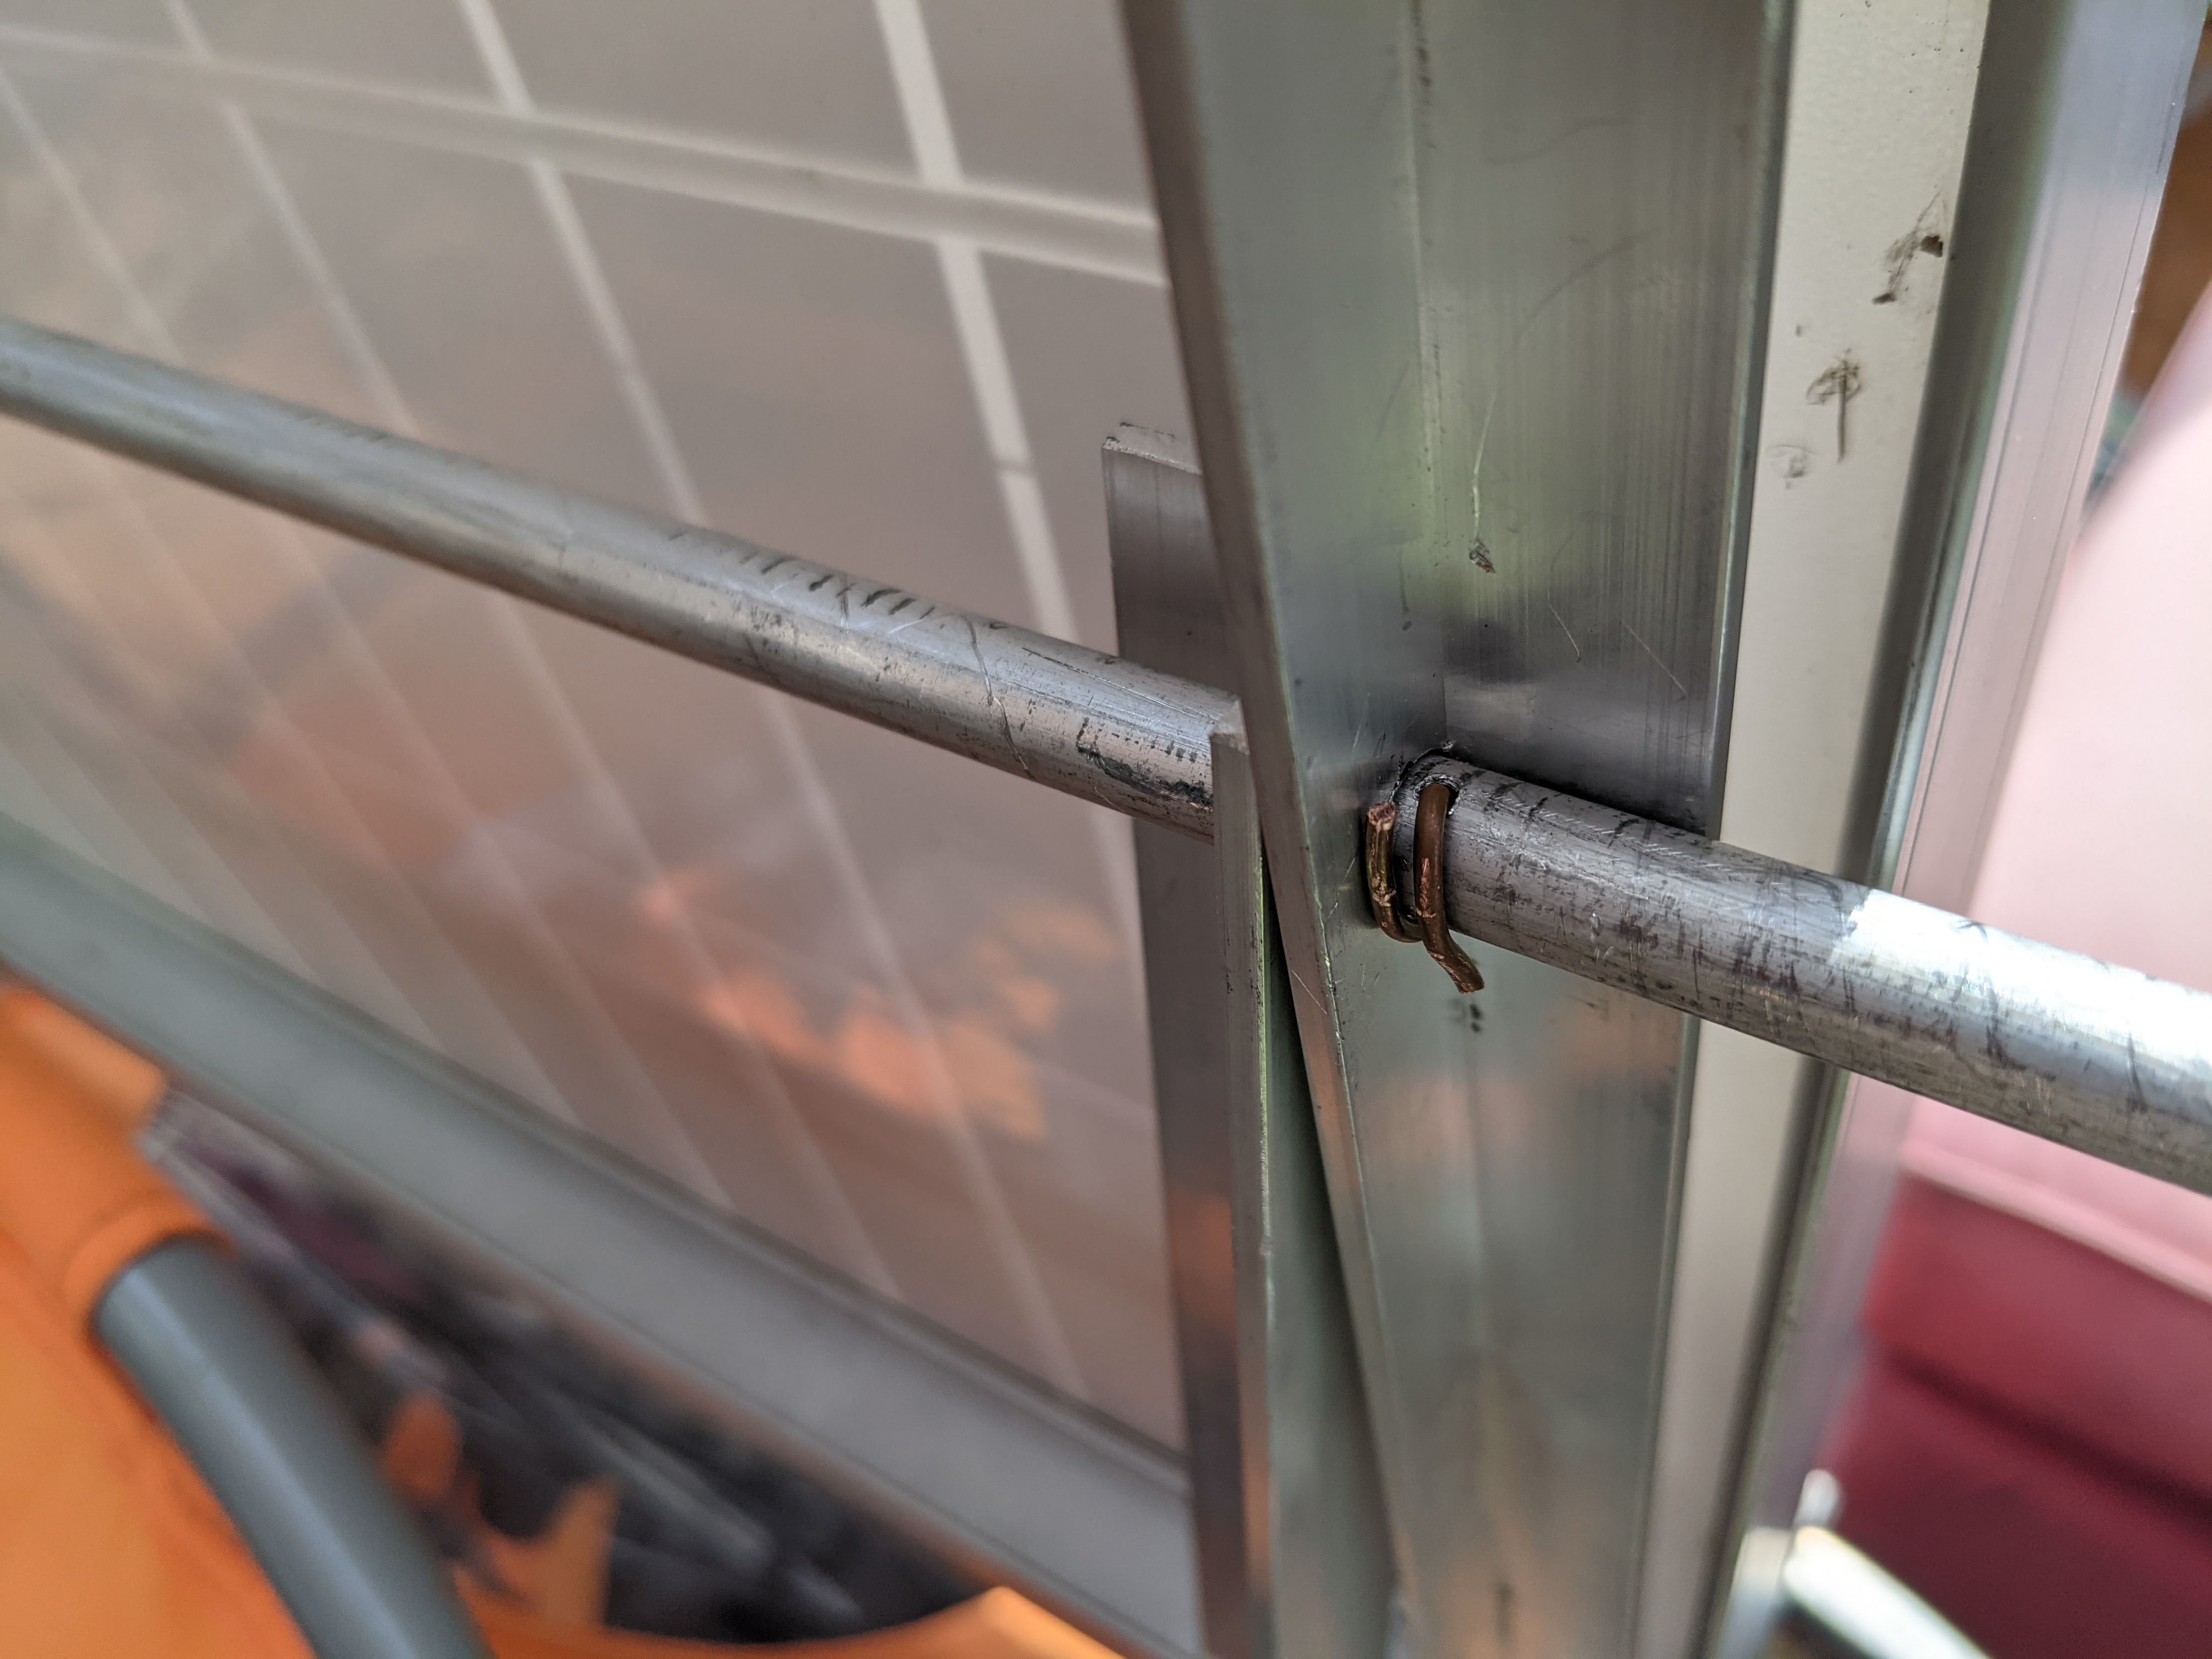
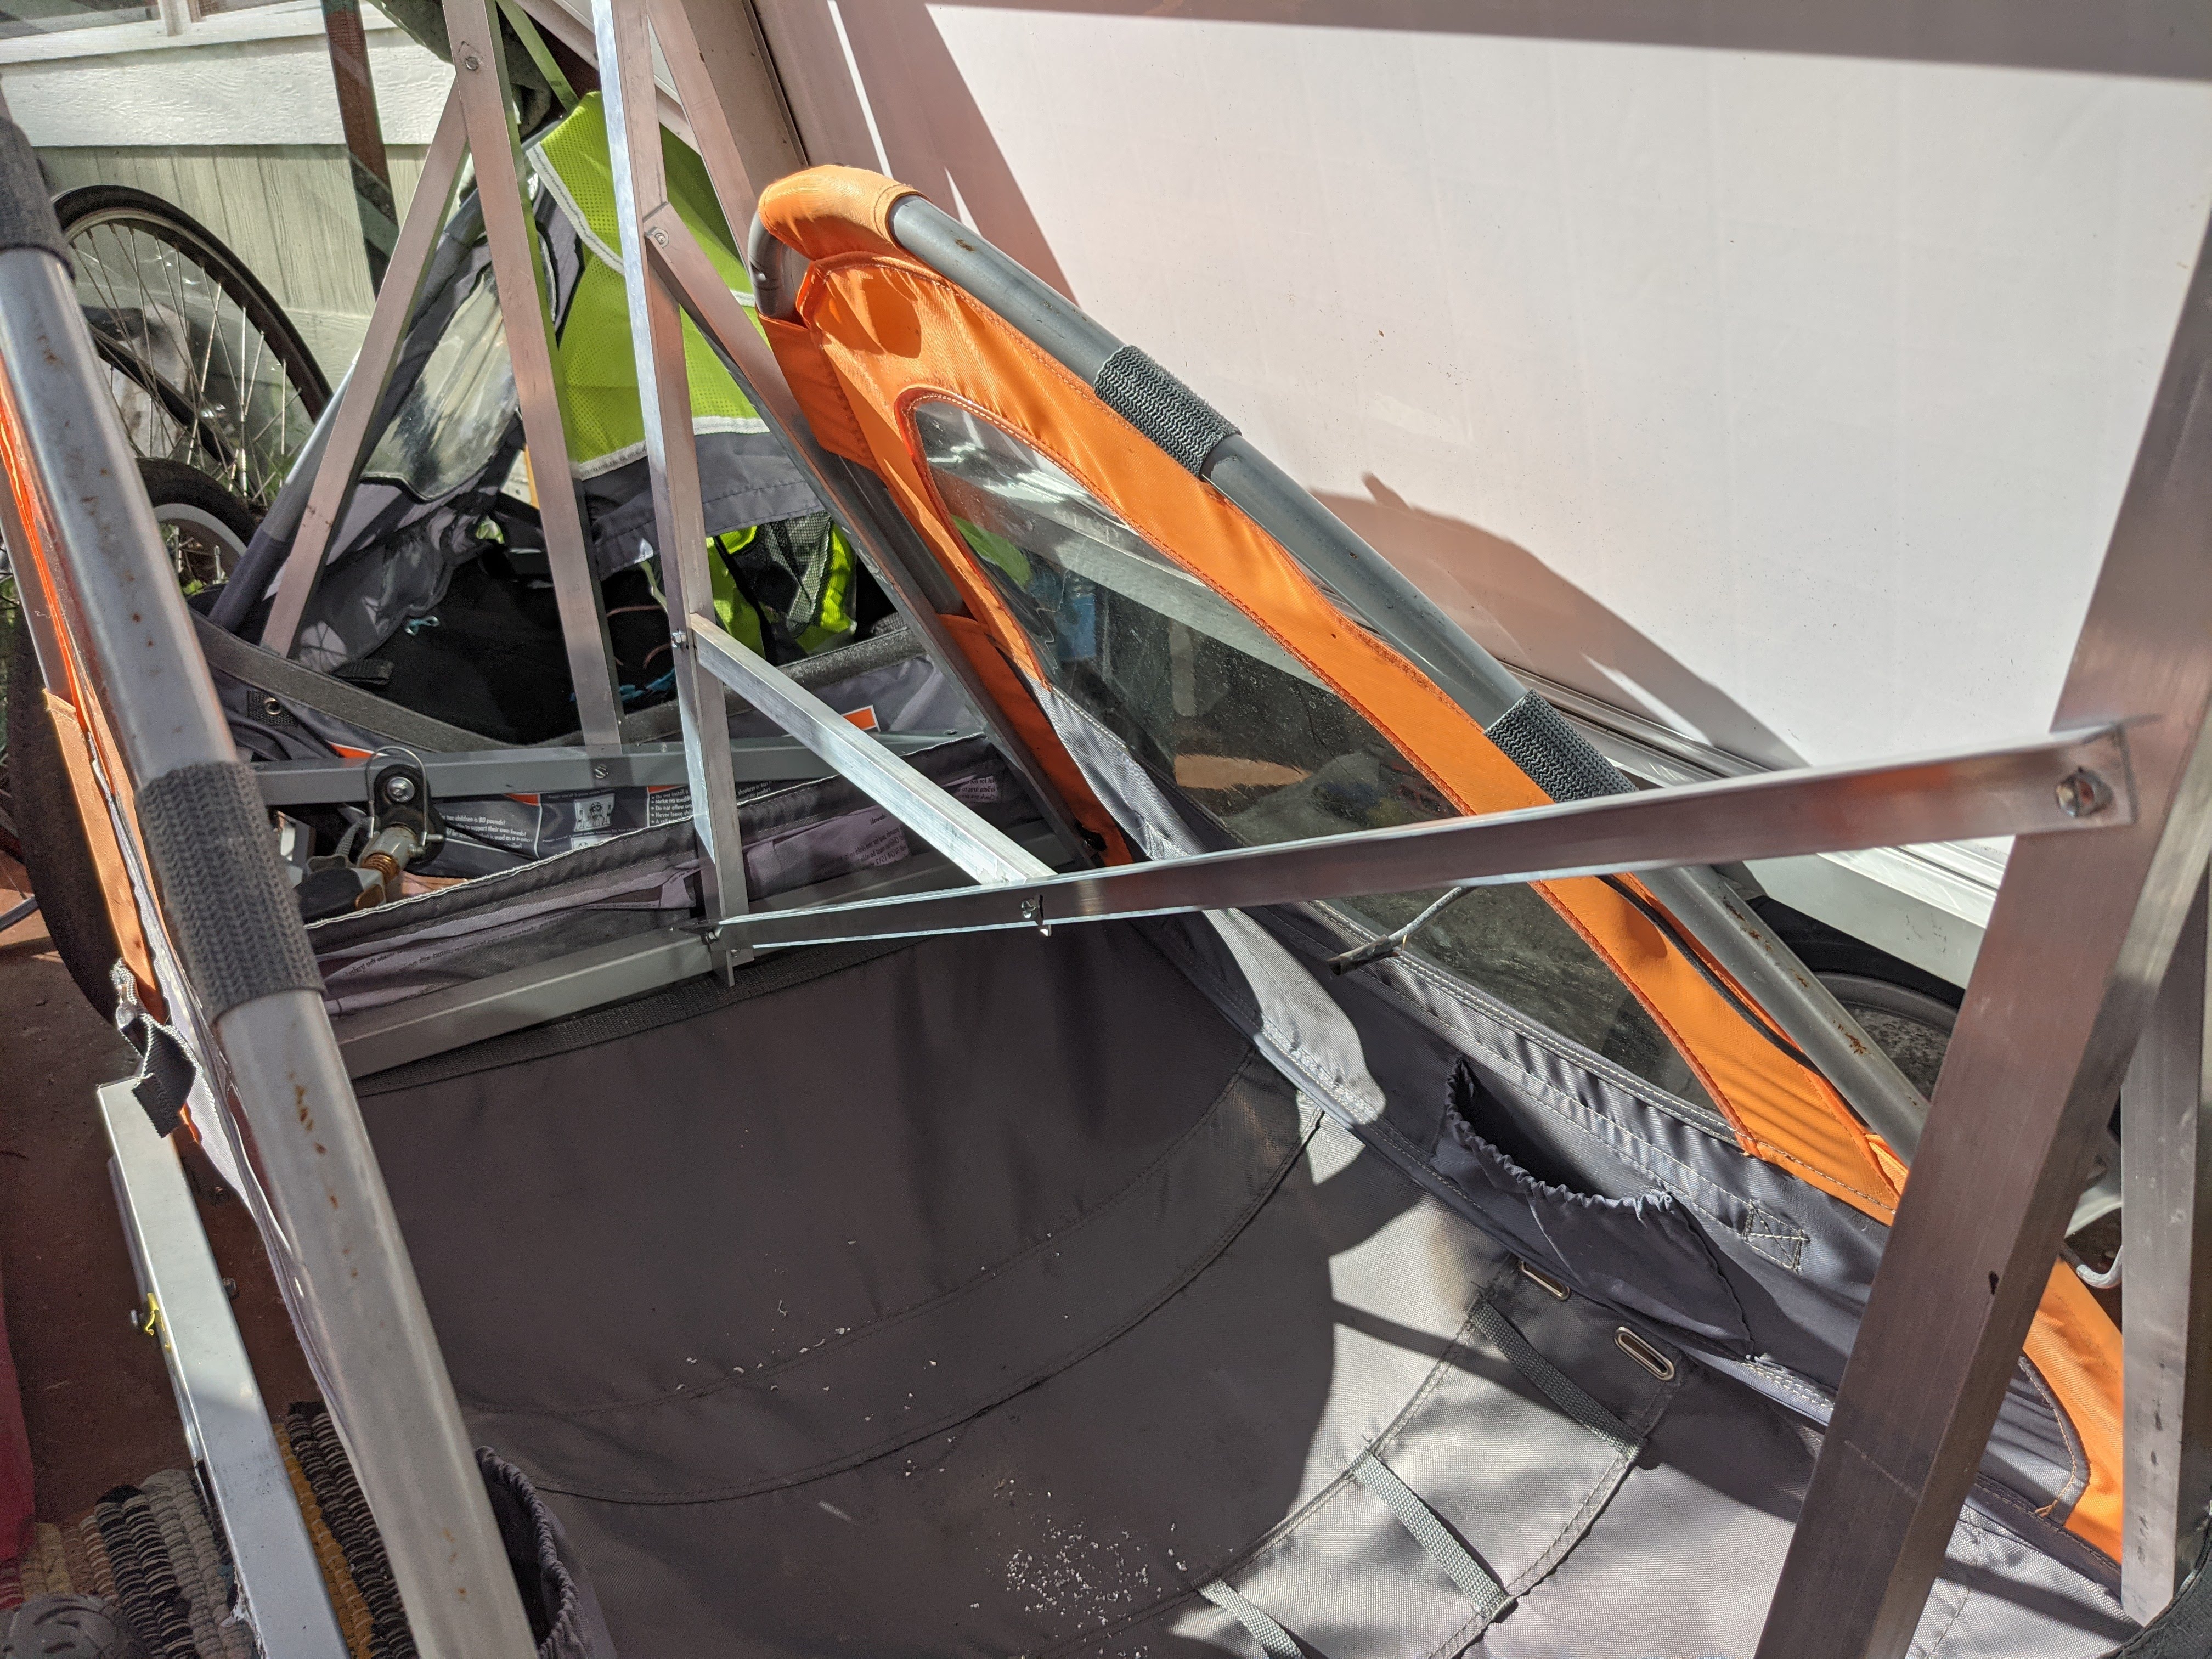
The panel is mostly supported by the central pole, but it's kept at the proper angle using another bracket.
Overall, this design has two advantages over a "four corners" design that I've seen in other setups like sunbiker.com. It allows easy rotation to face the sun angle, and it cuts down on parts required to nearly the bare minimum.

This design gives it a little bit of extra flex, but that is probably a good thing to dampen some of the vibration. I'm really pleased with the results.
Trailer connection
This part was surprisingly difficult, and we actually experimented with two failed designs before arriving at our solution.
One failure was trying to daisy chain the carts using the's standard pivoting bike attachment as a connection. This wound up creating a double jacknife effect that made it totally impossible to move the cart backwards.
The second failure was more subtle. We attached the carts together firmly, but kept them in their standard orientation with their wheels far apart. This made it so that on sharp turns, the wheels of the lighter half of the cart had to slide sideways across the ground as it pivoted. So finally, we reversed the back cart so that the wheels were closer together. After figuring this out, we actually realized that pretty much all 2 axel trailers work this way with their wheels close together. Never noticed that before in my whole life!
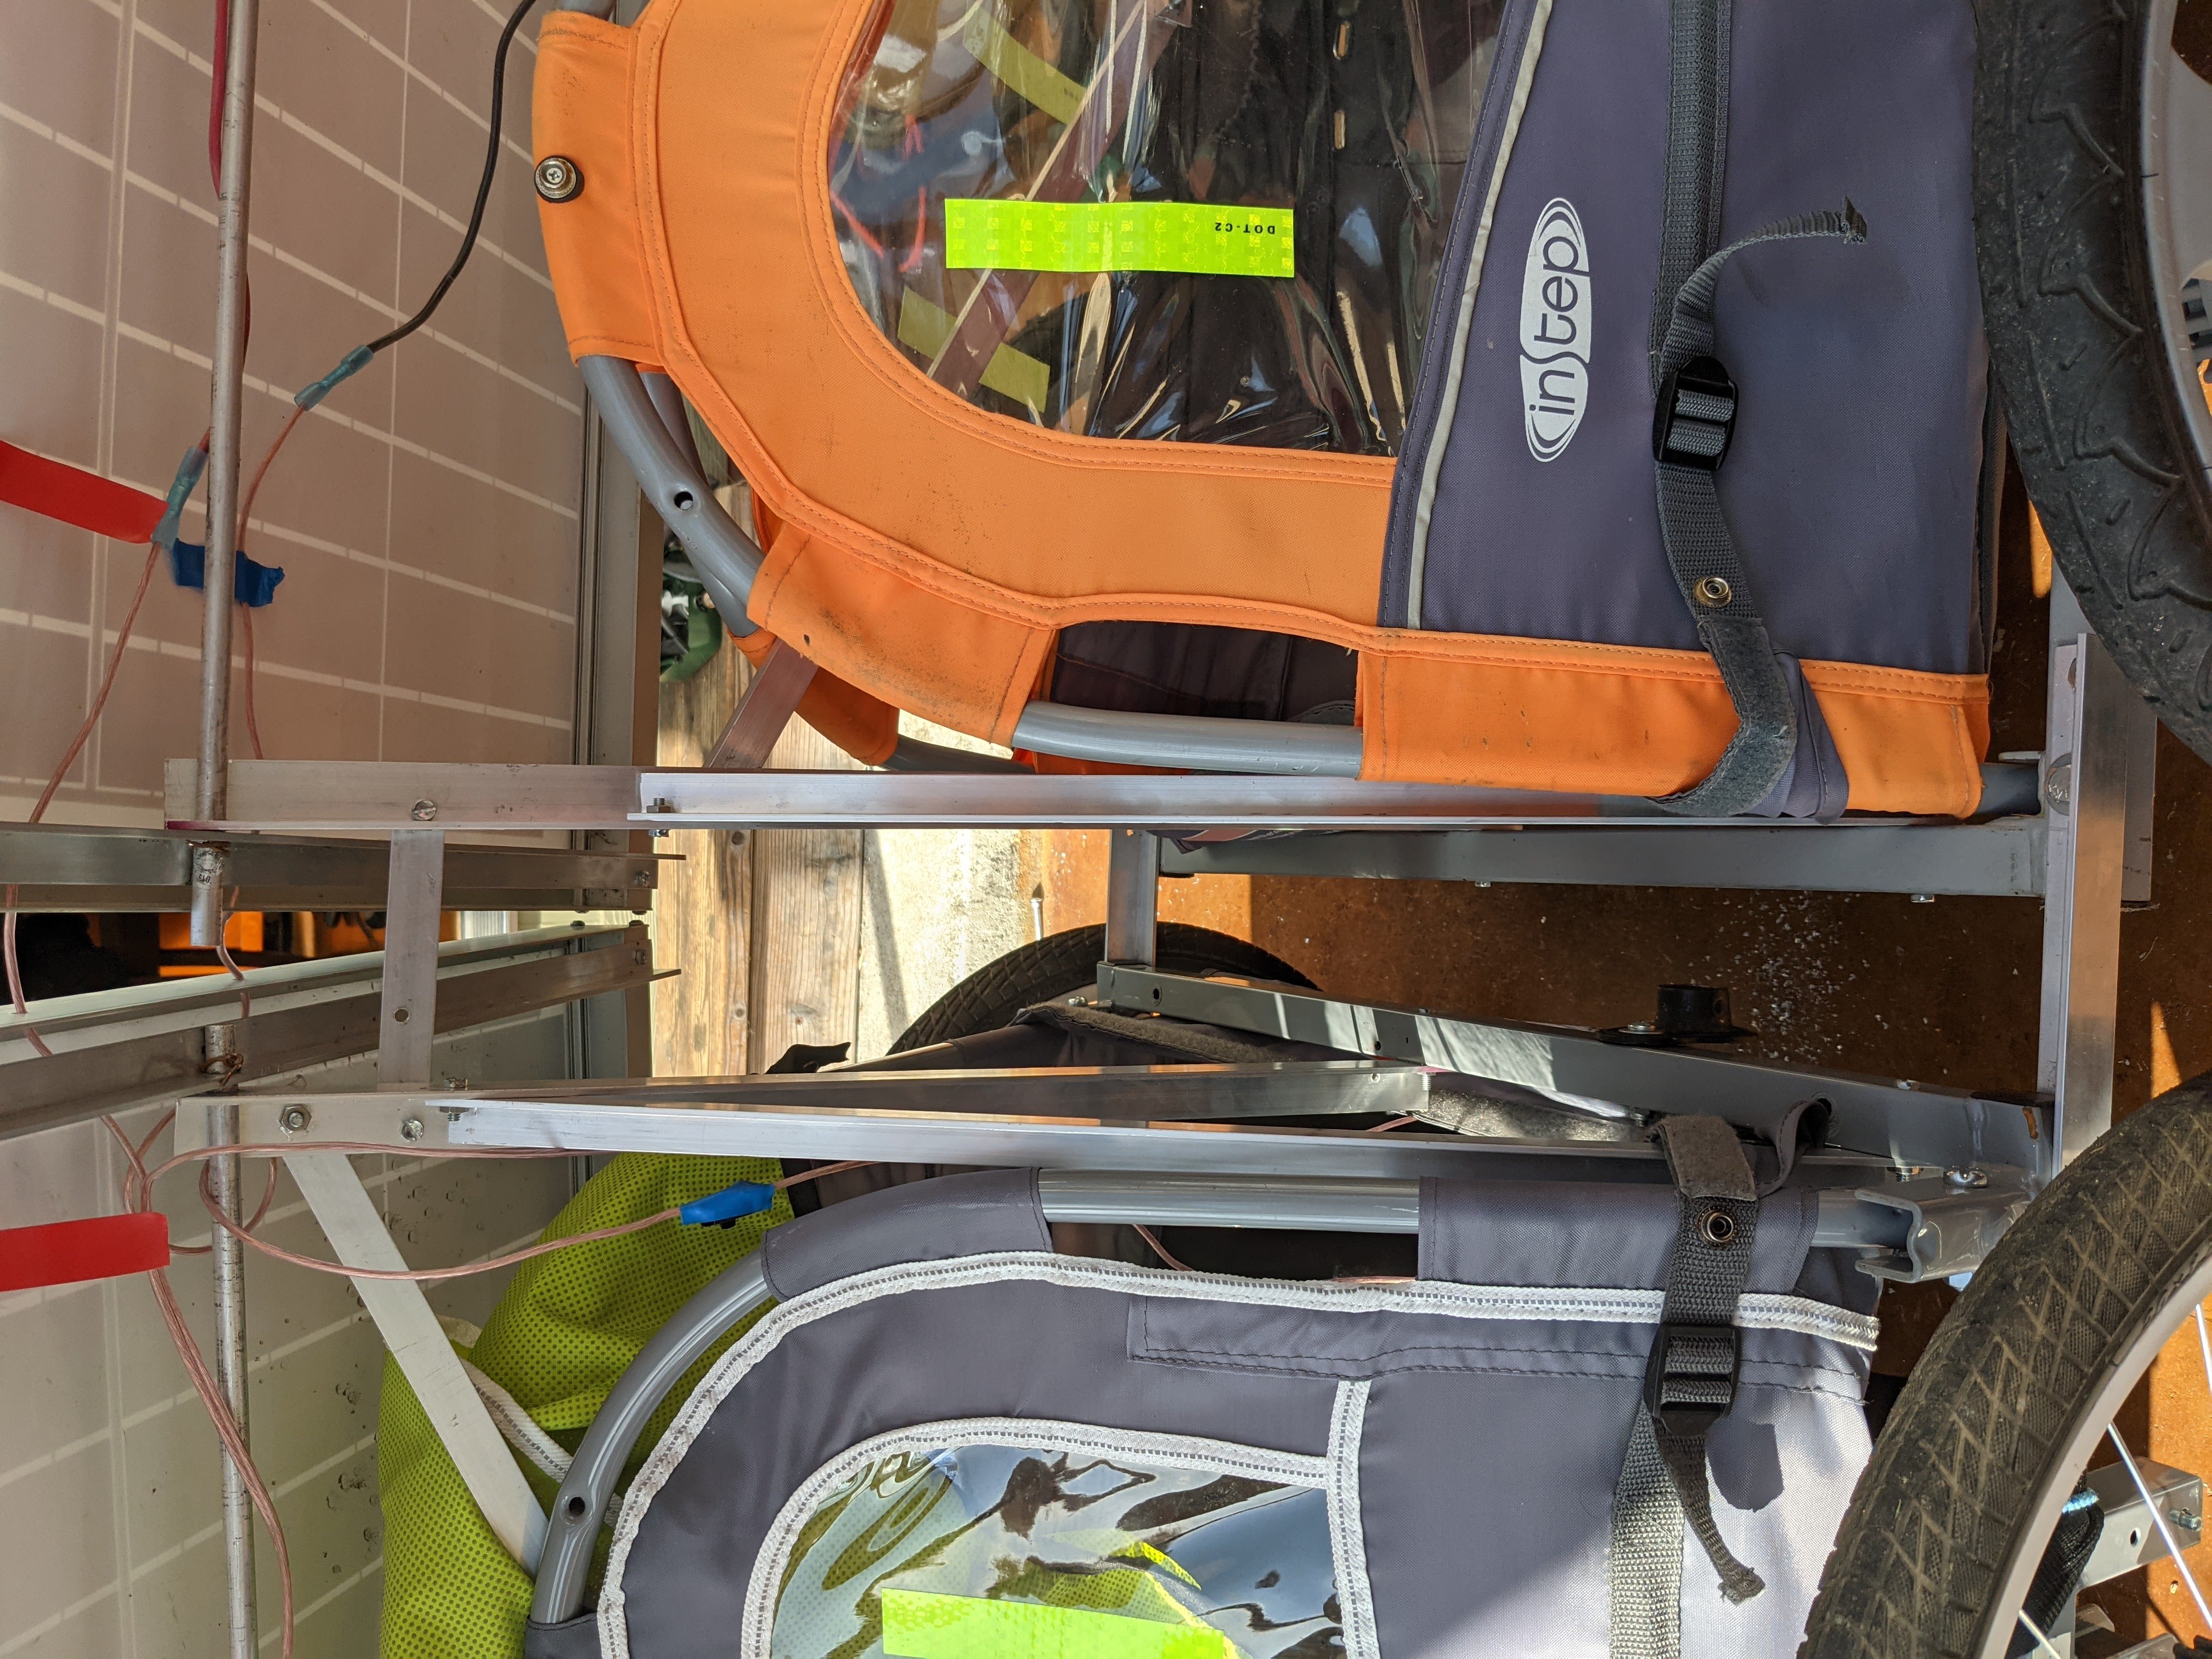
The attachments were just more L-brackets. The last remaining issue was that the wheels themselves were quite different sizes and this made it hard to line up the frame such that both wheels were on the ground. We did the best we could, but currently the trailer needs to be loaded with most of the weight in the front in order to keep the front wheel firmly on the ground.
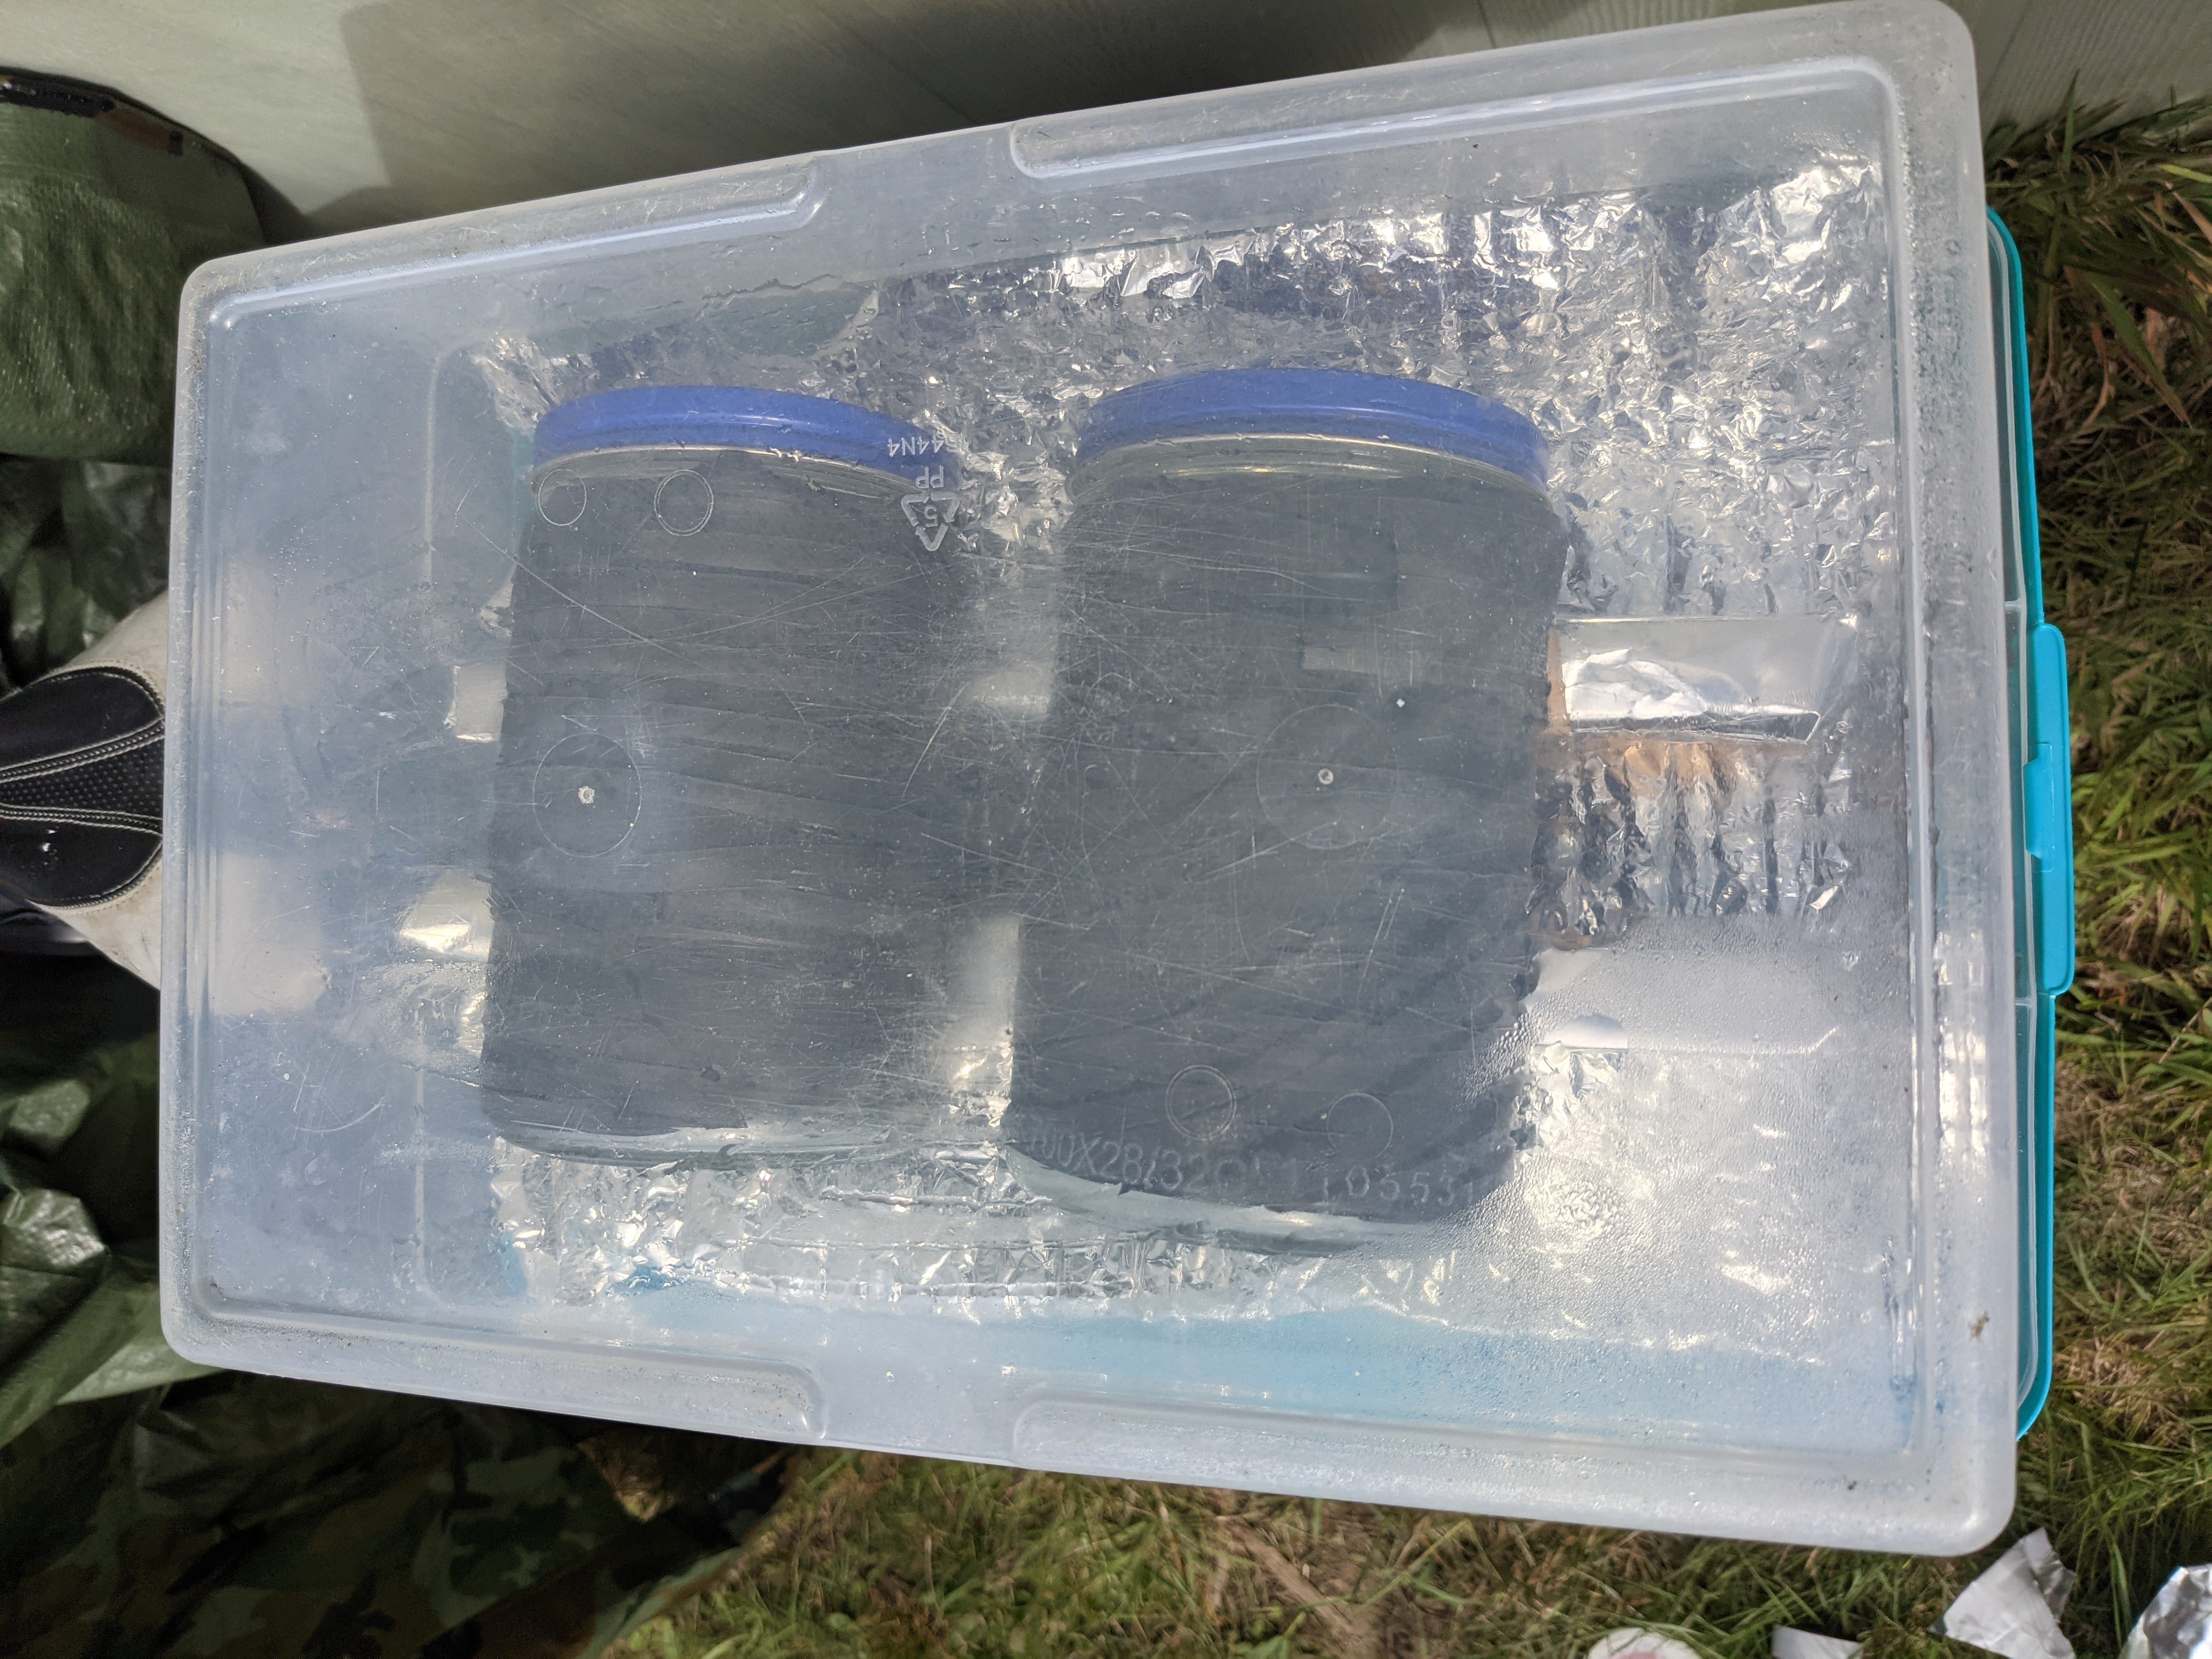
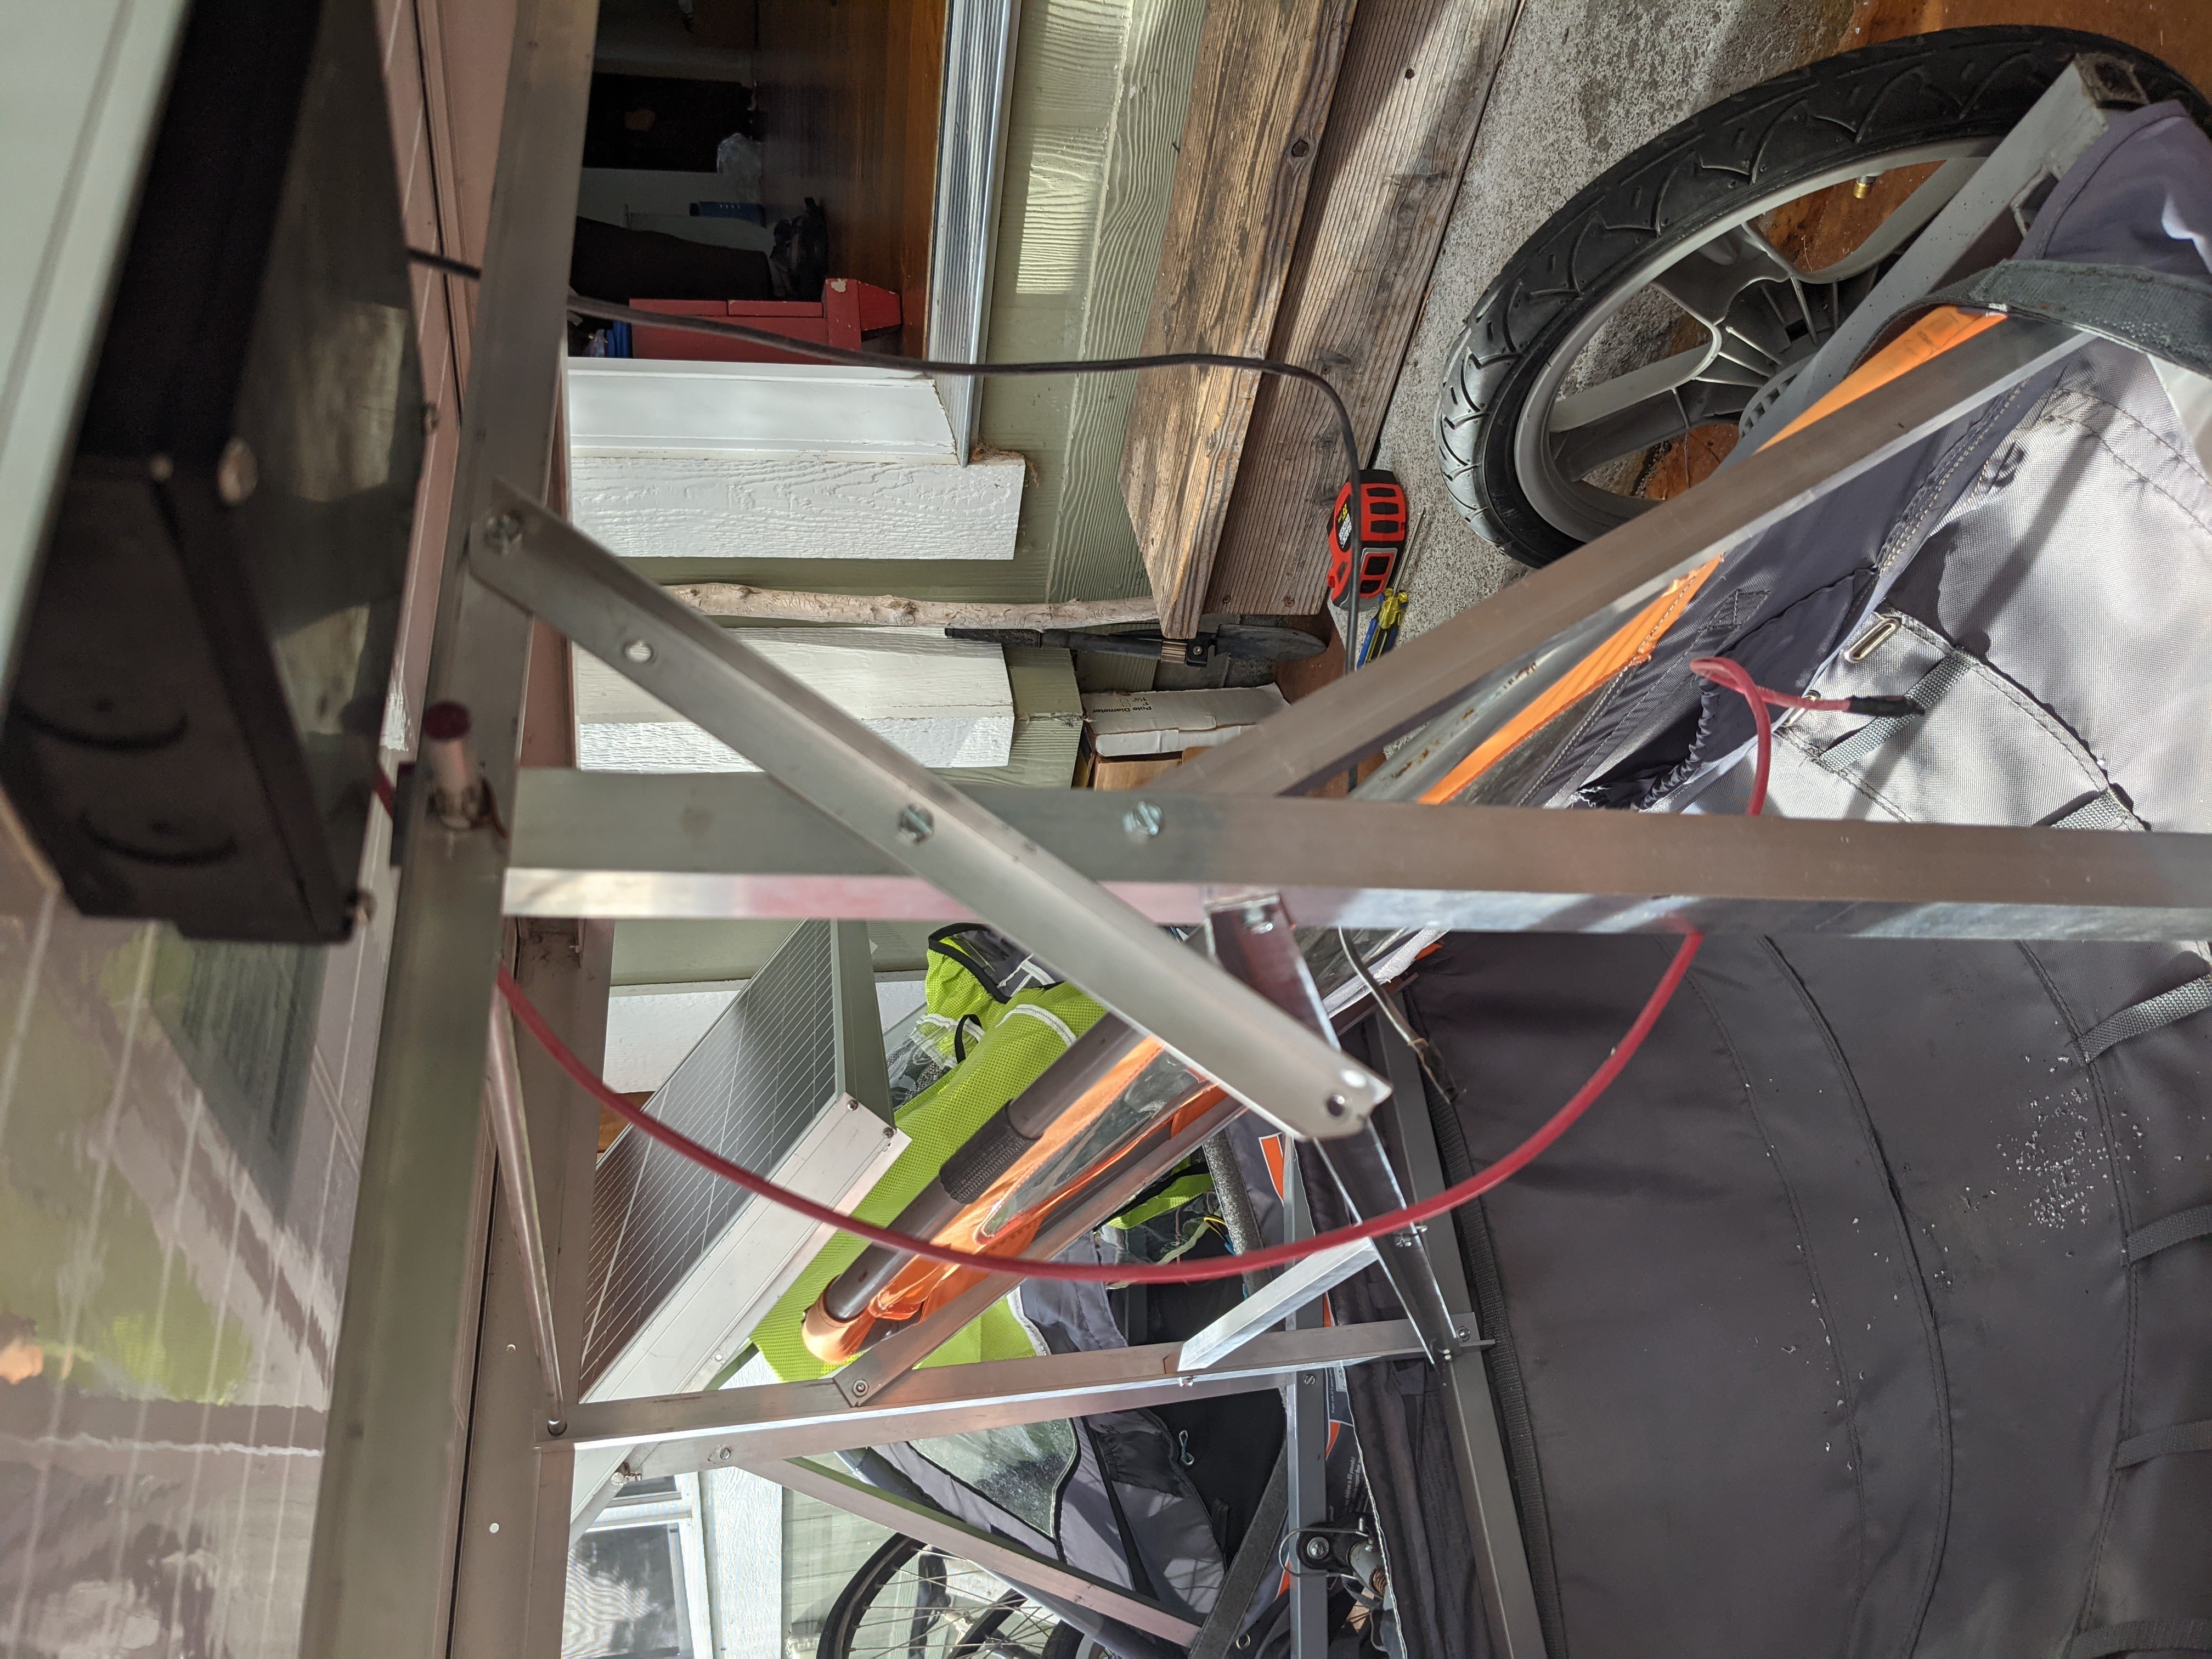
Battery charging station
This setup was very easy to build, and has been documented many places. I just attached the panels to a Genasun charge controller for a 48V battery. This setup is ideal because it takes essentially any input voltage and current and boosts it to the 54.2 V needed for charging with minimal loss of current. I connected my two 16V panels in series to give me around 32V since a smaller delta is more efficient and panels work better in series if there is a possibility of partial shade (which will be common on the go).
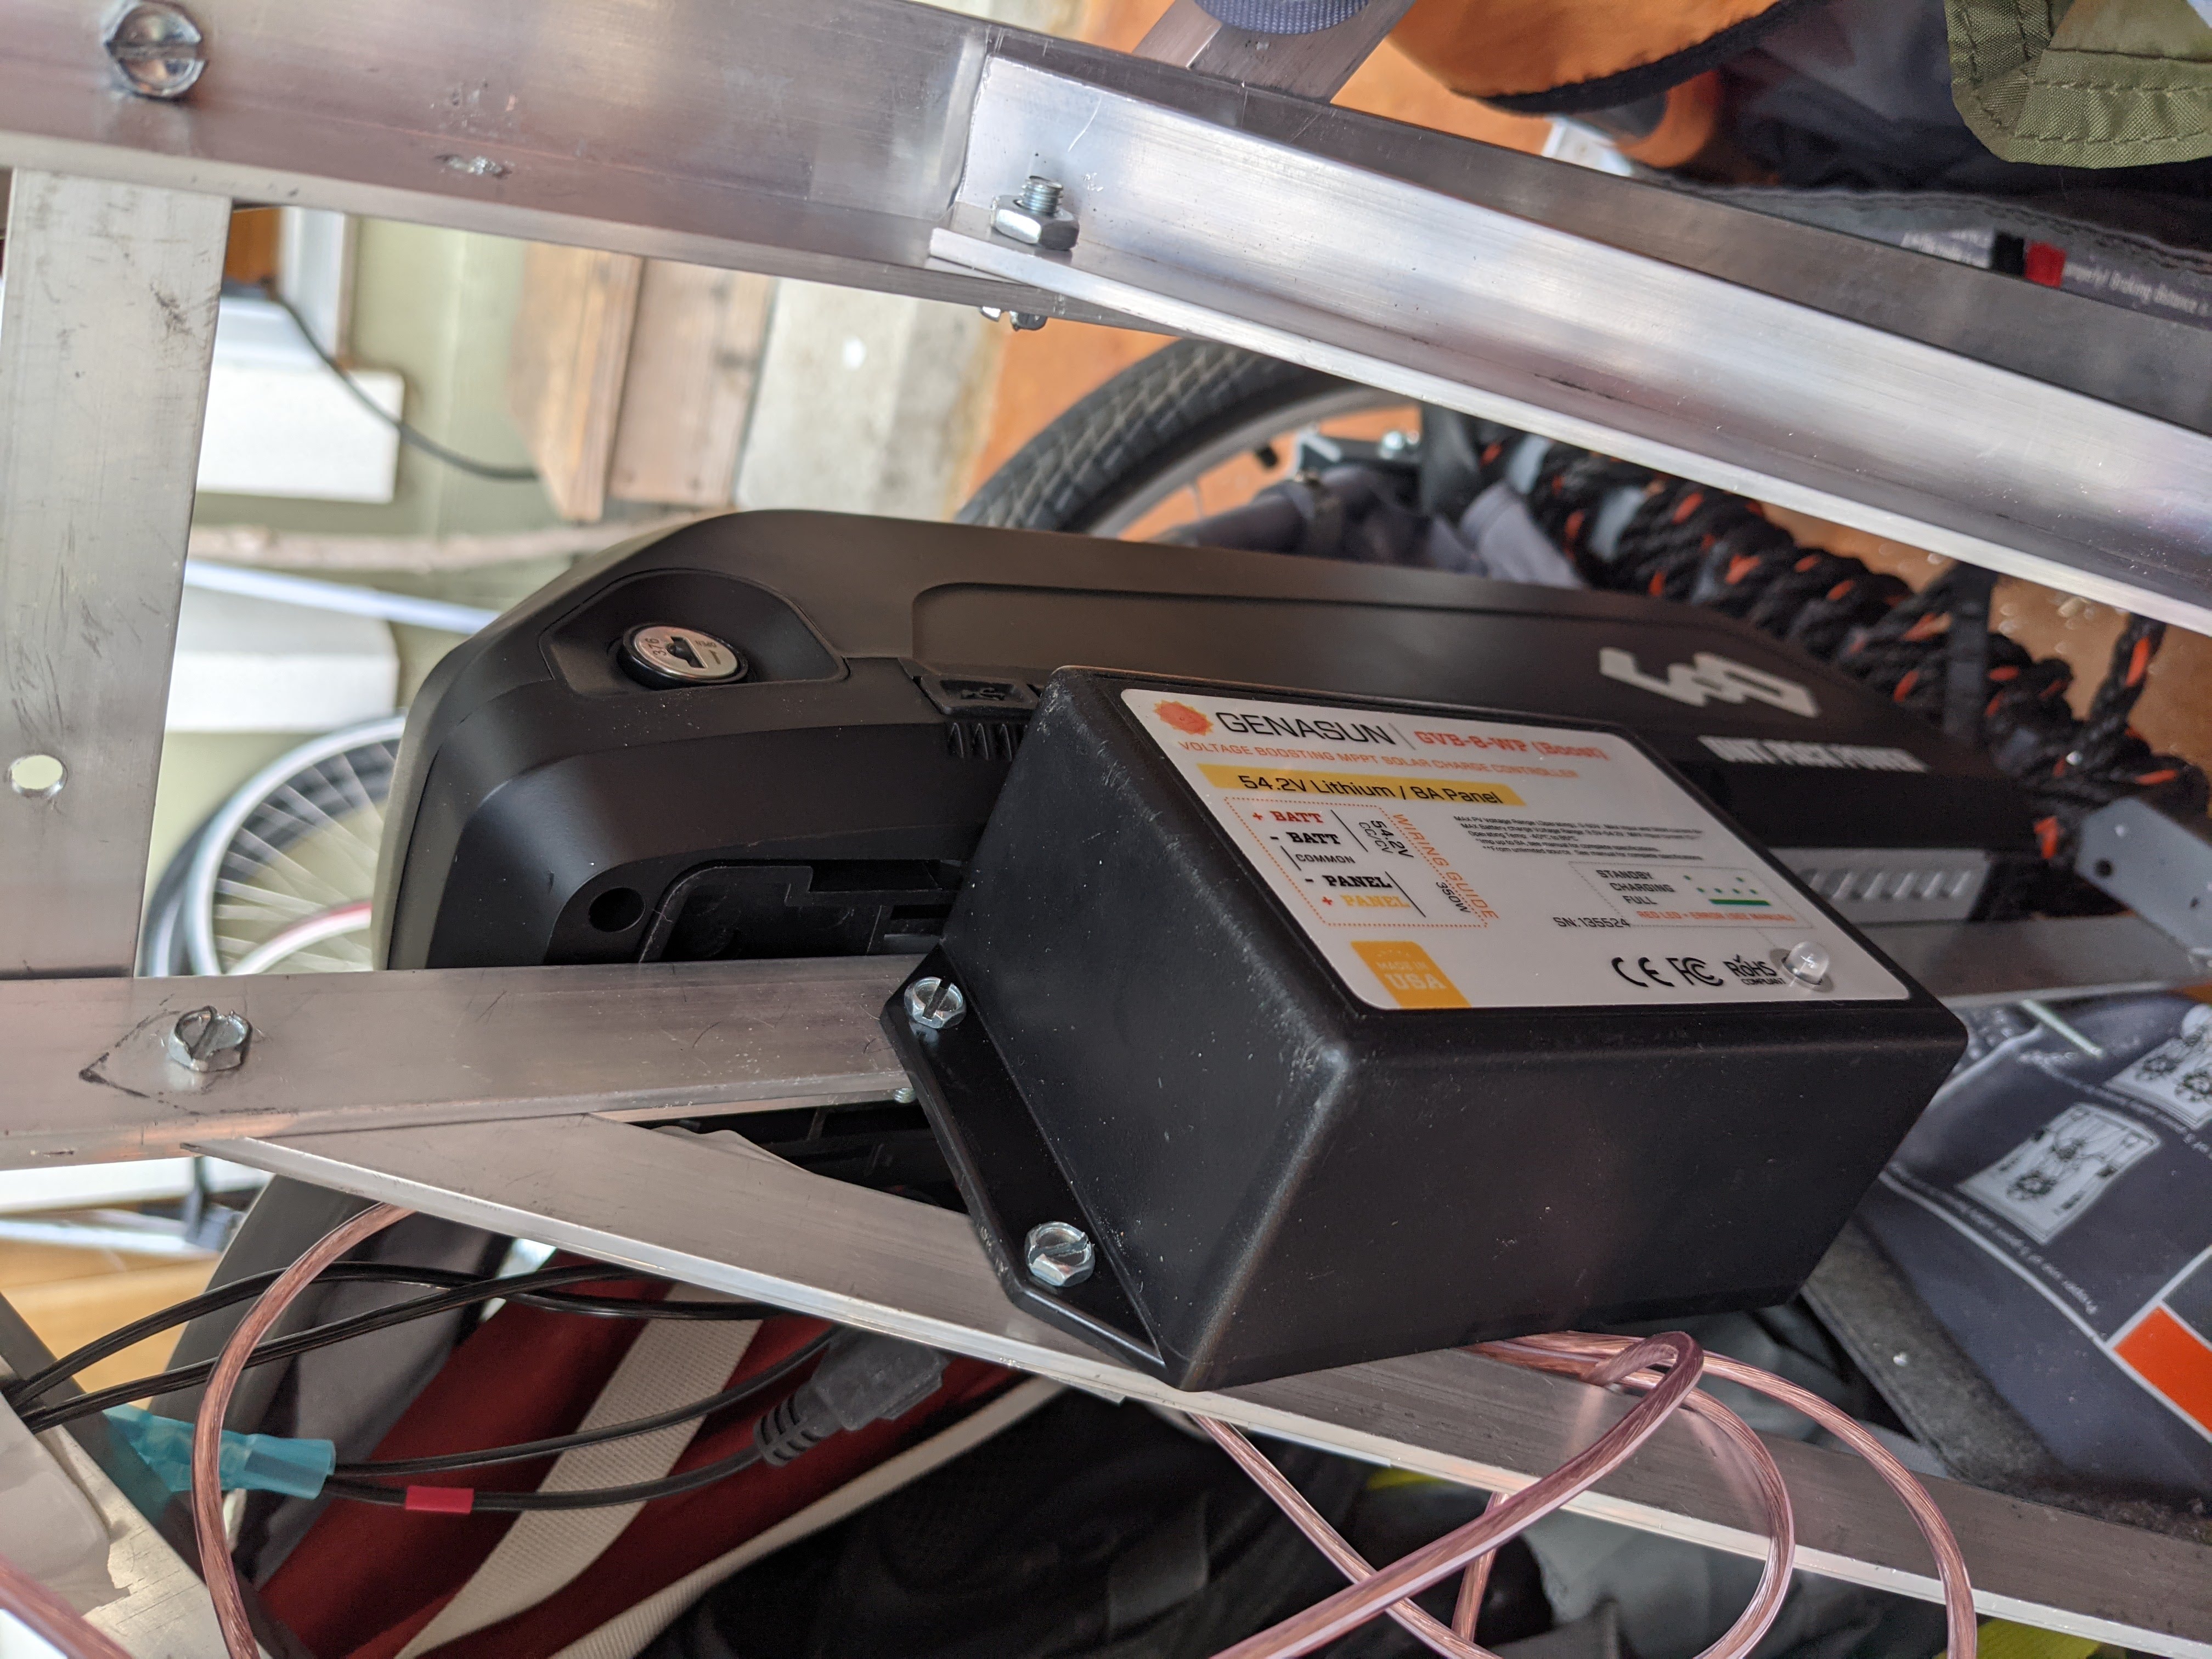
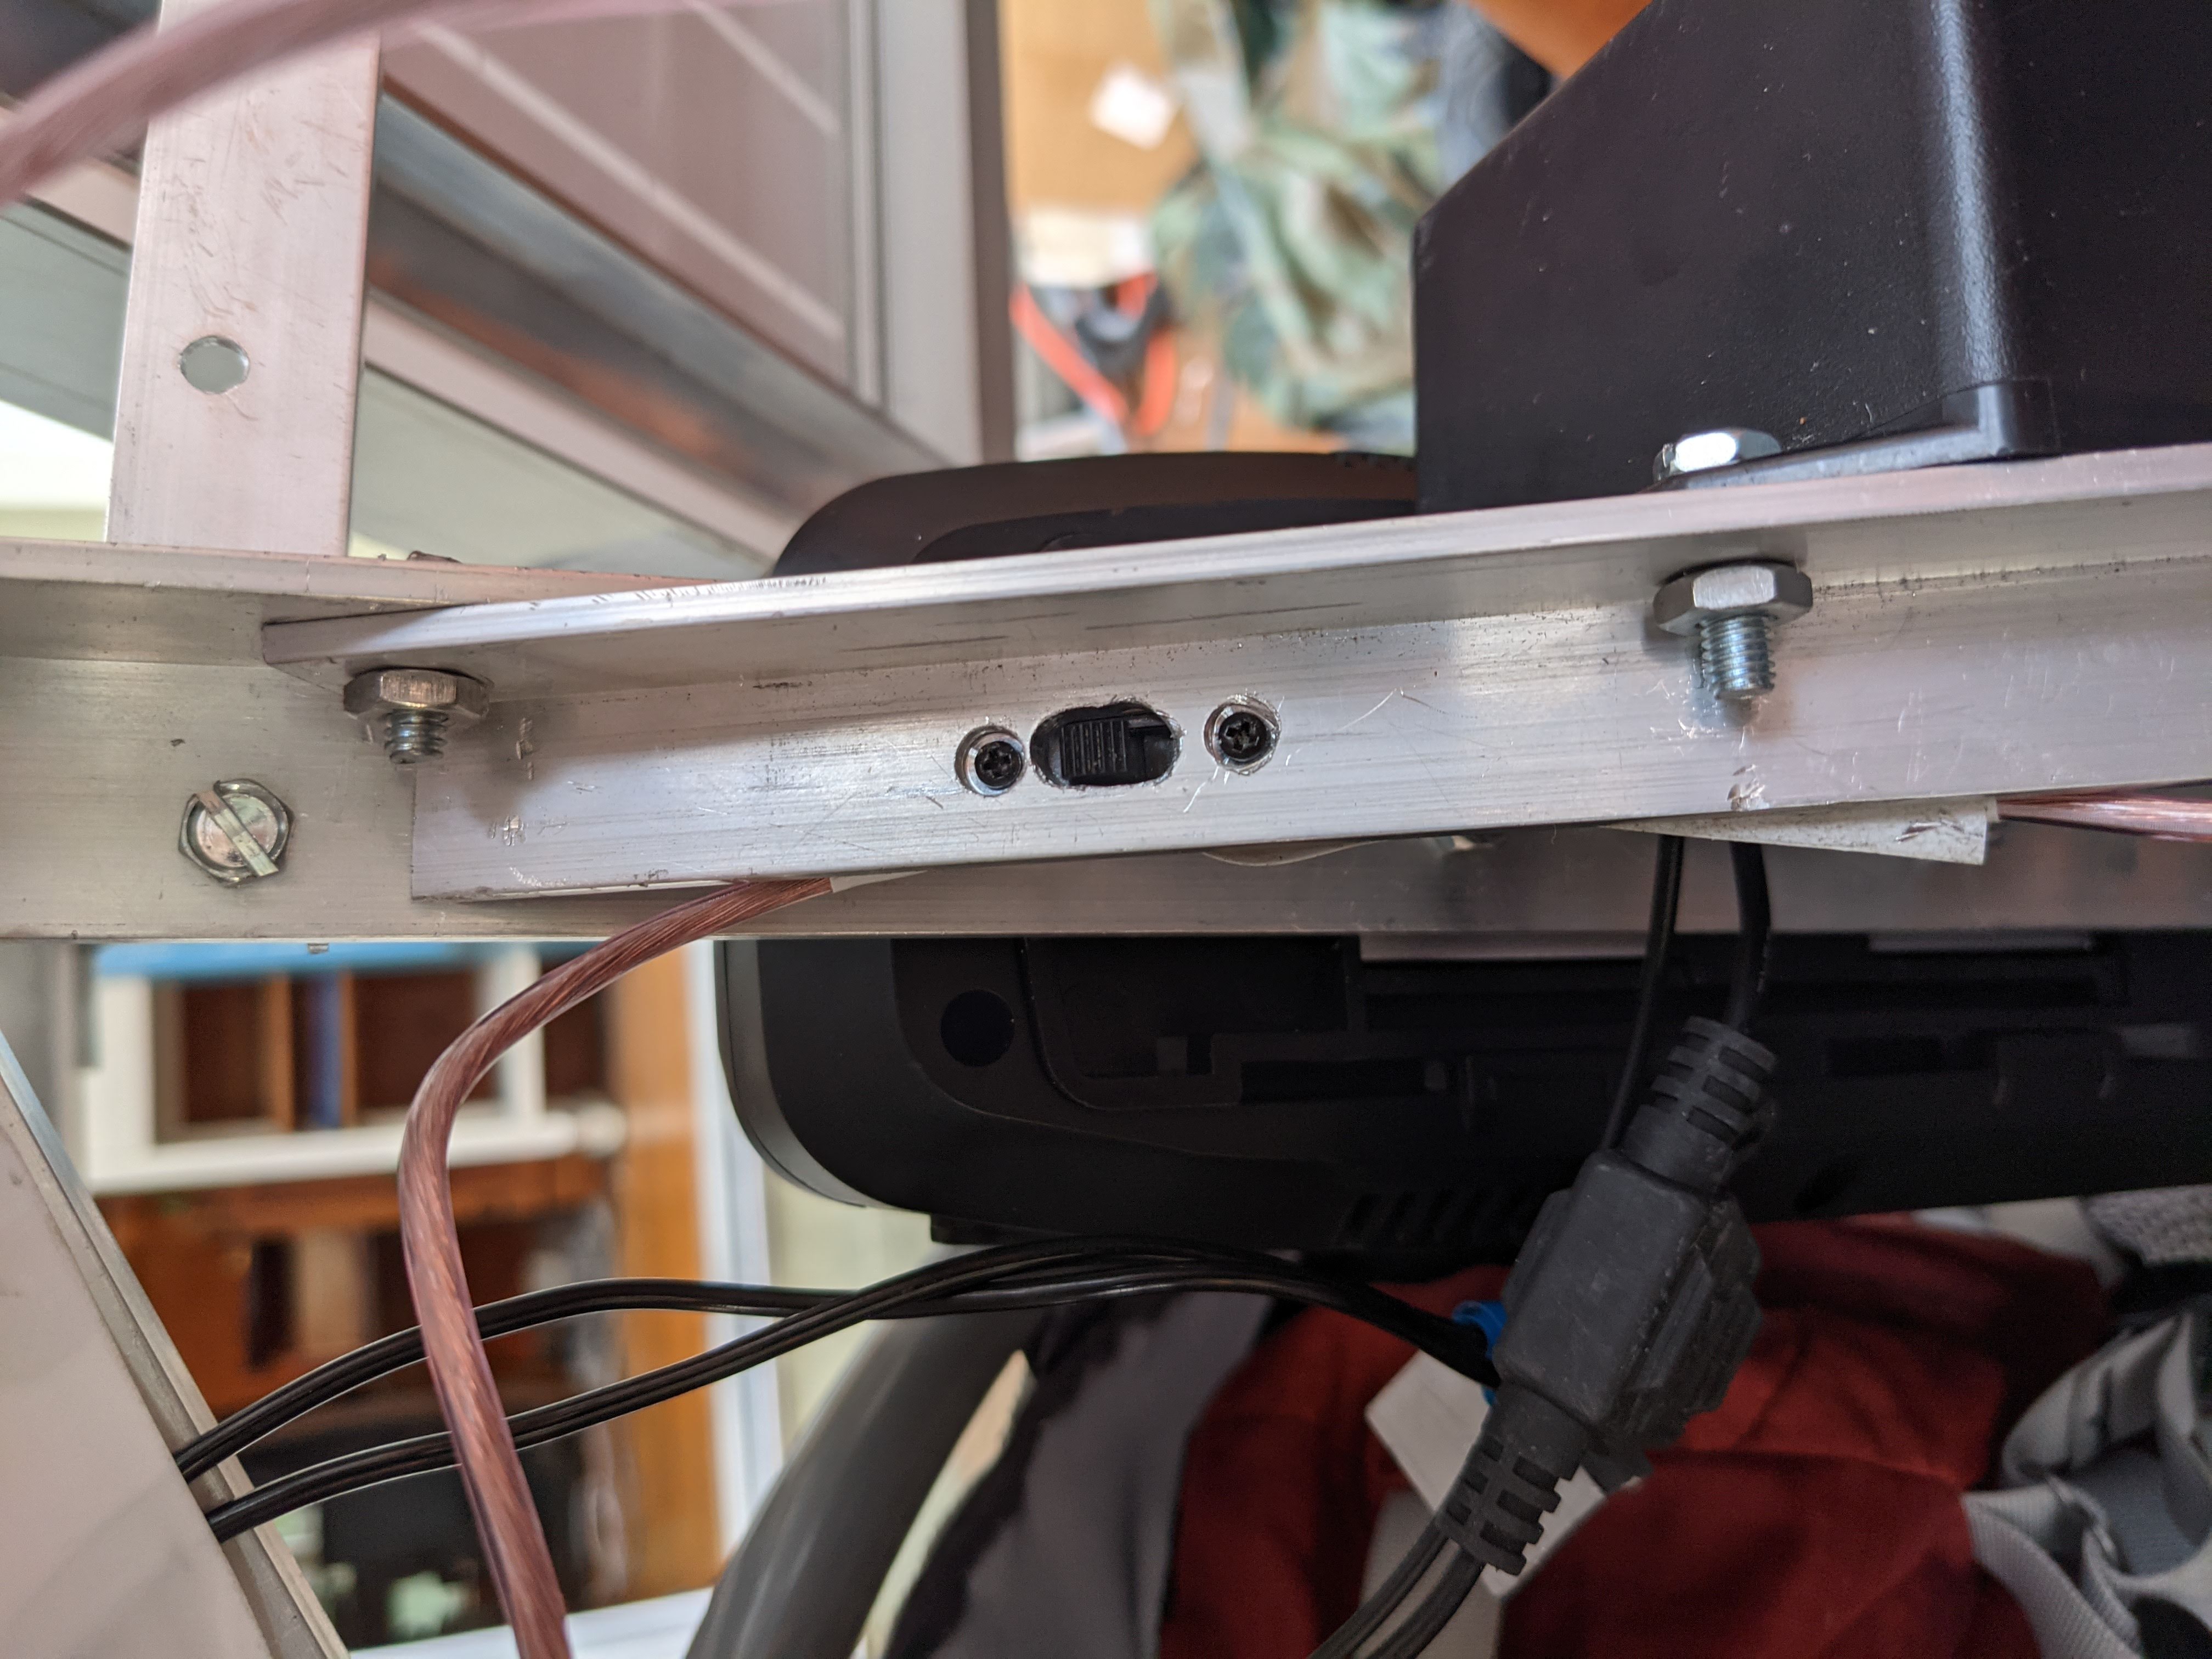
Aside from that, I just added a switch and took apart an XLR cord for the three prong attachment to the battery itself. Finally, I mounted the battery to the frame to stabilize it for charging while on the road.
Experiment: Lights
As an experiment I also connected some LED headlights, taillights, and a strand along the bike frame, using the ebike battery as a power source. It looked pretty darn cool, but ultimately the setup was too cumbersome and we decided it was easier to just attach regular rechargable bike lights.
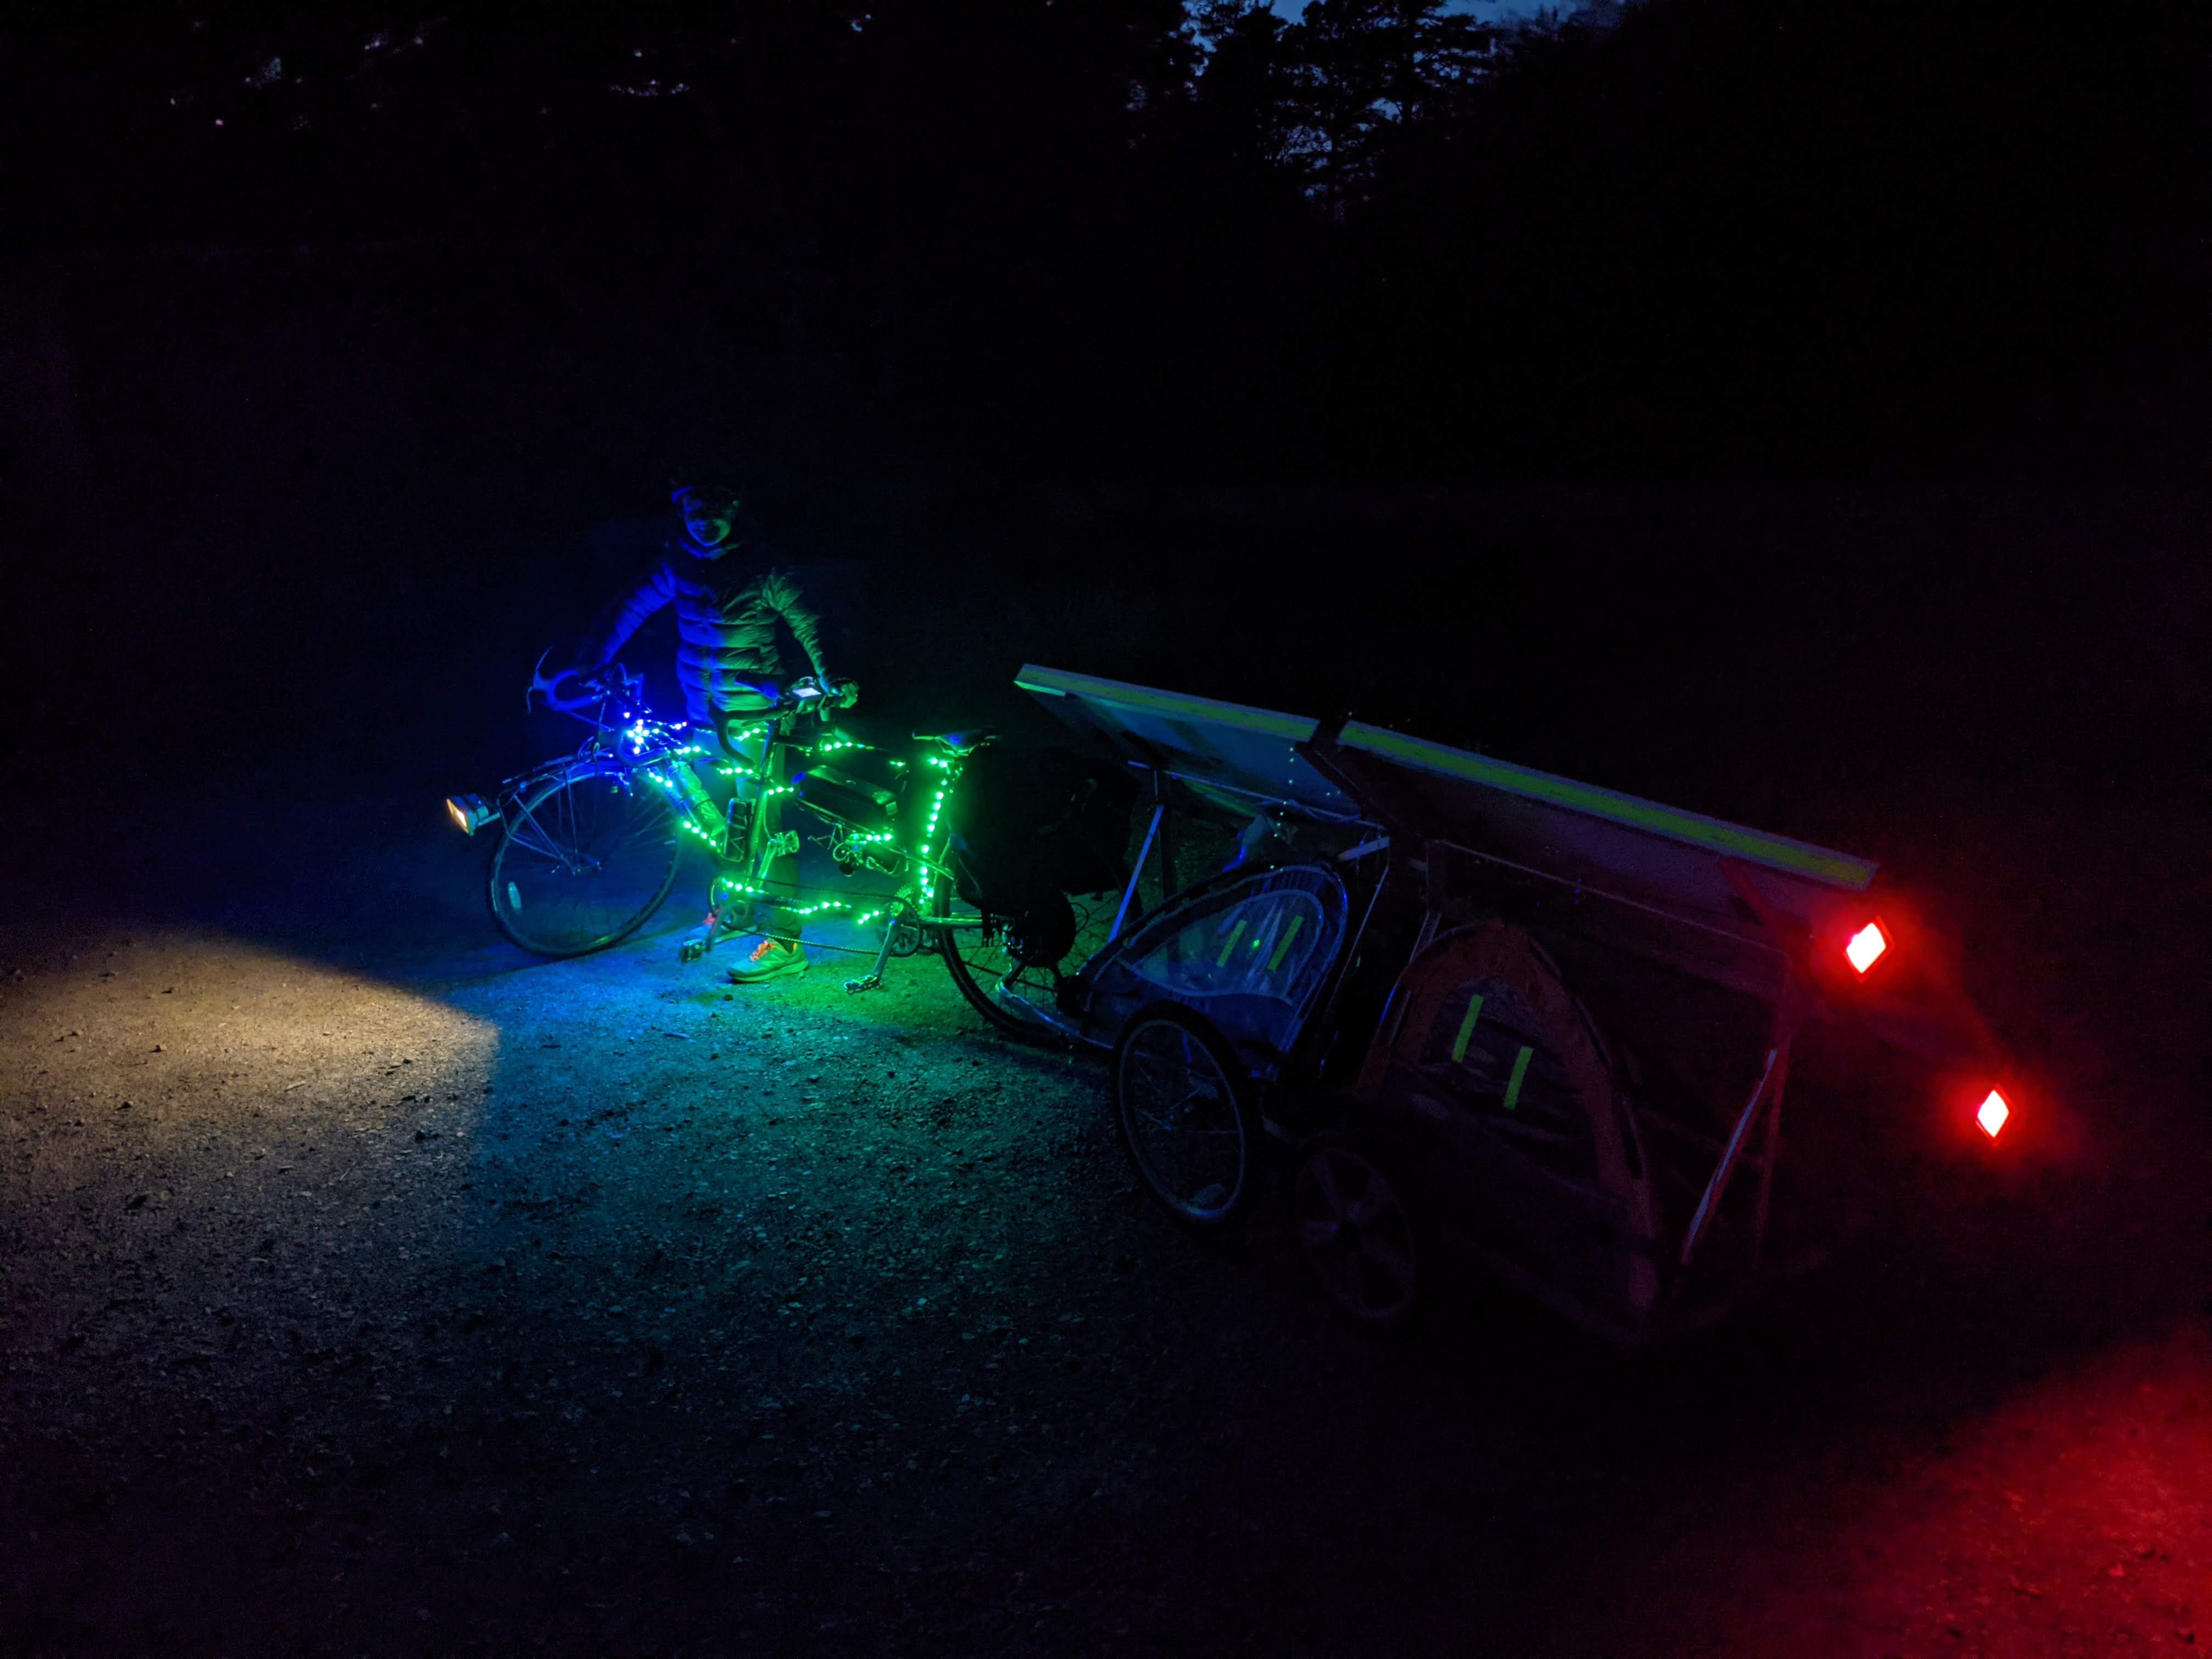
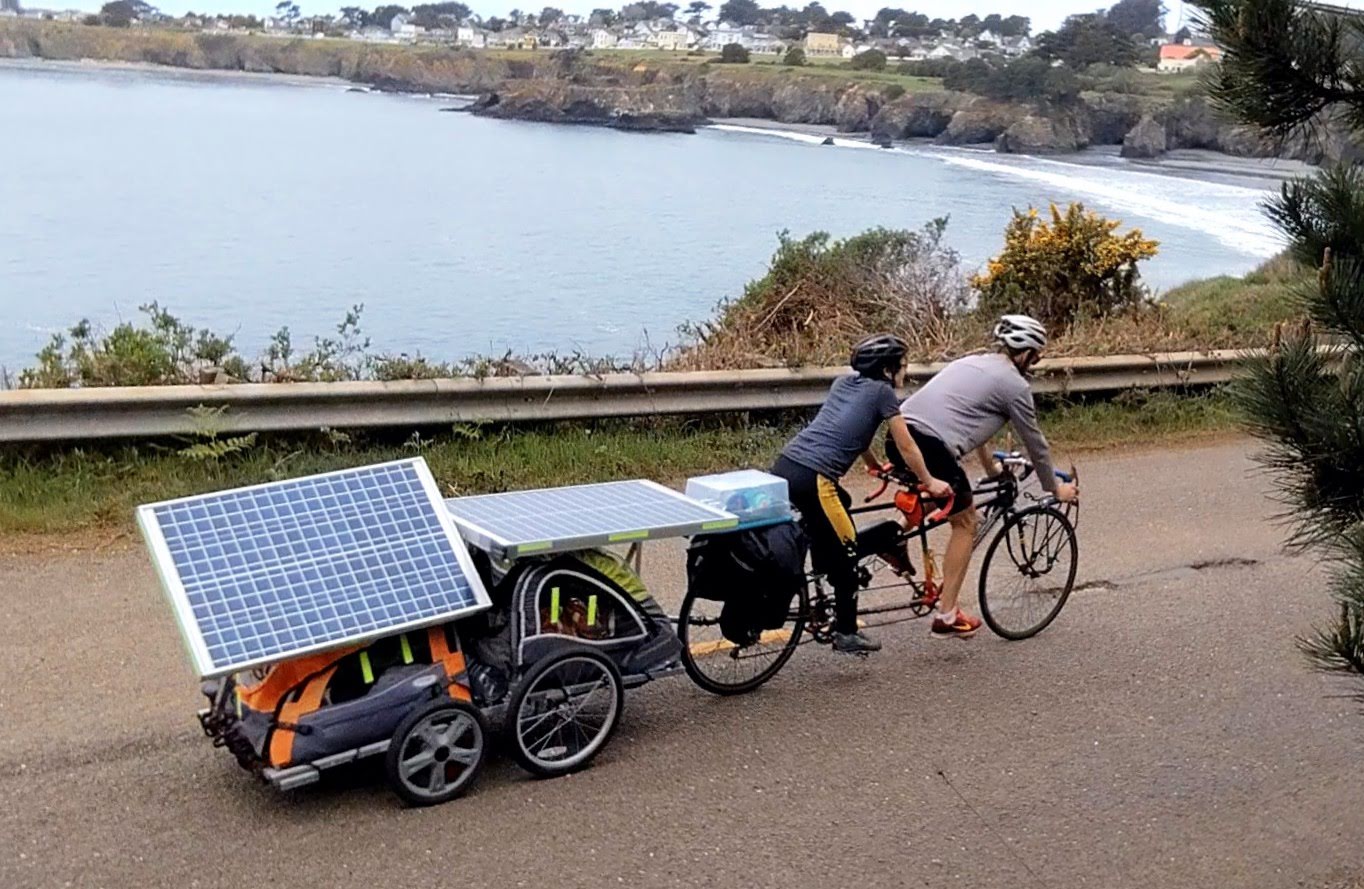
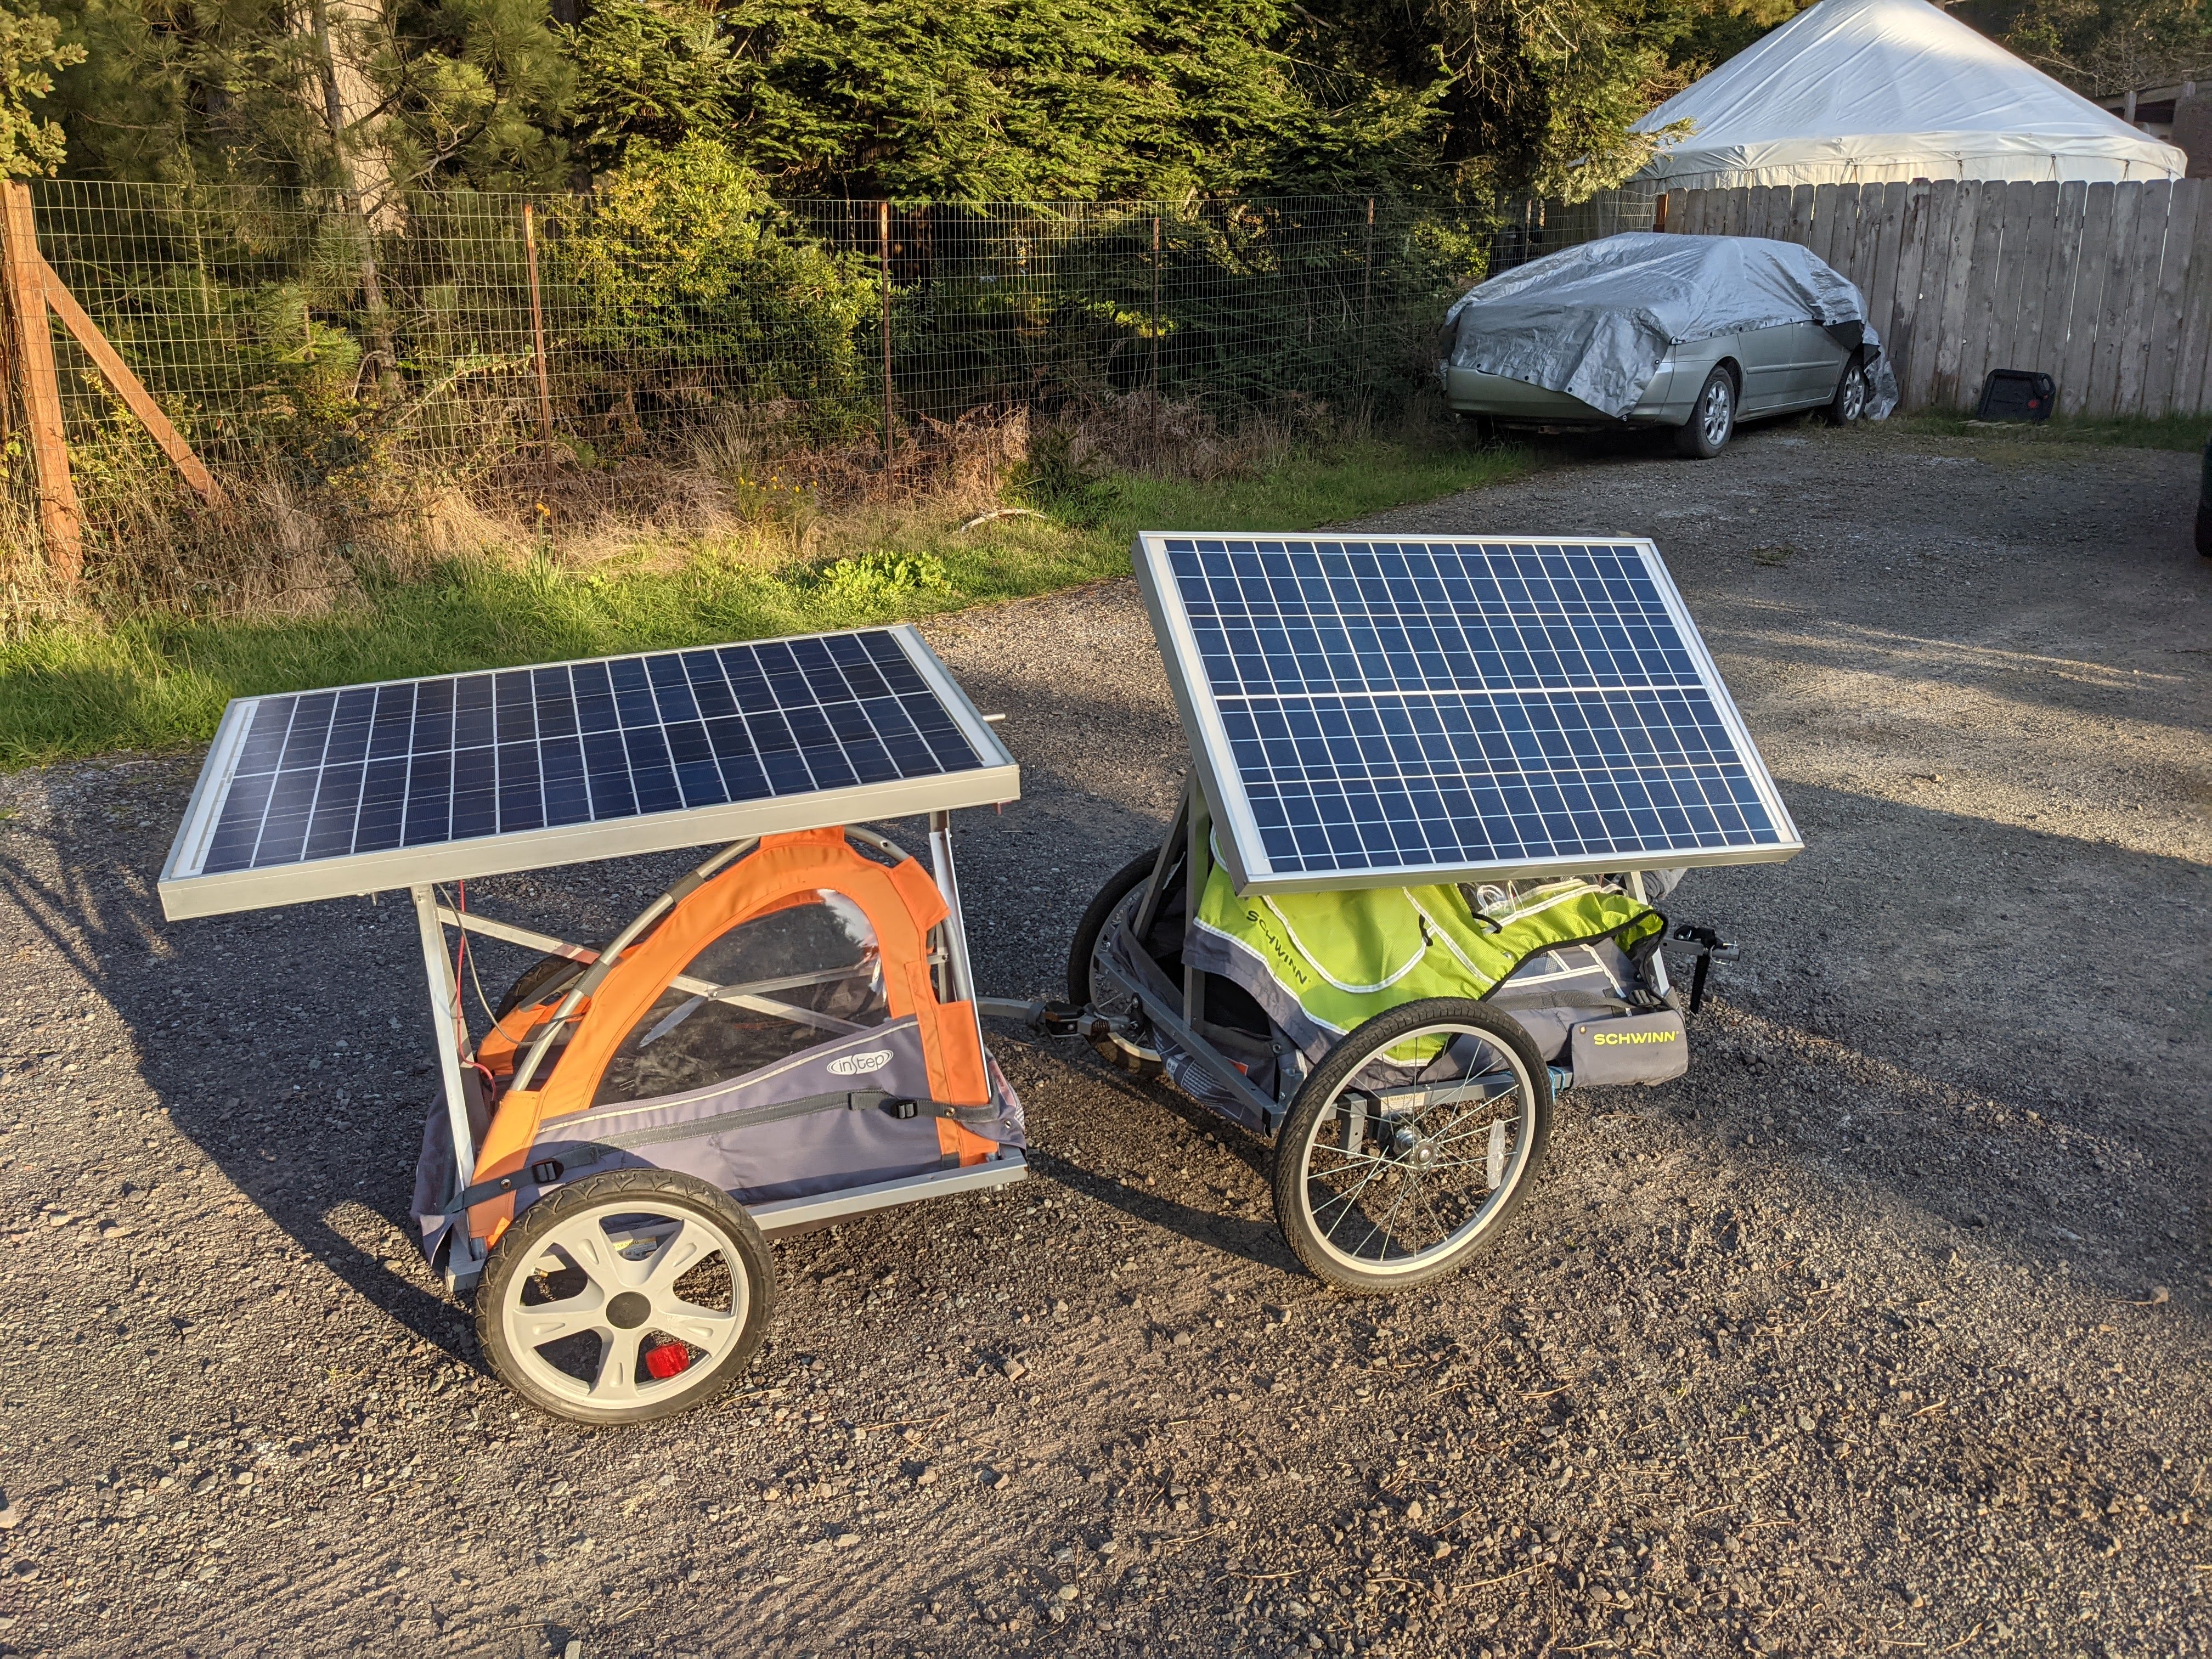
Completed design
When it's all put together, the tandem bike and trailer is quite a long and brightly colored vehicle. Hard to miss when driving past.

We typically can travel between 8 and 20 mph, making sure to engage the regenerative braking on steep declines to keep us from getting out of control.
The trailer and solar panels, plus all the hardware together came to $600. So for bike and trailer together we are looking at $2200. Note that this is like 1/20th the price of an electric car and we shouldn't ever have to pay for electricity like we would with a car. Granted cars can go faster, carry more, and keep you dry, but if the real goal is just mobility and the lower speed is acceptable, clearly this cart is a win!
Grand Inaugural Test Ride
We took the completed unit for our first test drive and documented it with some footage (including some ✨drone shots✨).
We traveled 35 miles over 2 days. Keep in mind that we were carrying at least 150 extra pounds of trailer, solar panels, and gear and traveling up and down some substantial hills along the northern California coast.
Our battery drained about halfway over that length, and it recharged to full in under 3 hours of afternoon sunlight when we got home. So our proof of concept seems to be working.
Trip of a lifetime; transition to a better life?
There are a lot of stories that start with a voyage. My partner and I are hoping that this trip we are taking is the start of a story for us. During the 2020 lockdowns, like a lot of people, we've had a lot of time to think and focus on how the world works as it changed around us. This has revealed some deep problems with the way our society functions, and that changes are needed. With this trip, we're hoping we can take a step away from the extractive careers we've lived in up to now. We want to move toward a better more sustainable lifestyle. As we go, we'll be trying to build out something we are calling the Co-op Trail.
The goal of the trip is to tap into the solidarity economy and try to make it around the country relying as much as possible on human-centric businesses. We're calling this the Co-op Trail and focusing on co-ops, as that is my personal favorite remedy to capitalism, but we'll also be supporting others in the solidarity economy as well. The goal is to make it easier to navigate from place to place via co-ops and other democratic and mutualistic companies, without relying on exploitative businesses along the way.
The reason we're trying this is because we think it's important to try to bridge all the highly local mutualist networks together so that people can roam the country just as freely as they do in the exploitation economy. In fact, if this trail catches on, I hope that everyone can roam even more freely as networks of trust expand and resources become less strictly commodified. I've written a longer post about the idea if you want to learn more.
We're hoping to live this mini-retirement for at least a year and emerge on the other side with a renewed commitment to work in the world in a more sustainable way. I think this style of slow, low-energy travel will catch on as more people can live remotely full-time, and I hope our project to work through and connect the co-op economy will inspire others to reduce their extractive mindset as they go.